What are forms?
HTML form elements allow users to interact with the website by entering data rather the being passive consumers of data. There are many types of forms. They can be short or long – ex.: Google basic search vs advanced. The Google page
www.google.com is an example of a short form. The
Google advanced search is an example of a long form. Forms have one or more input fields/dropdowns/ or other ways to enter data, along with a way to submit that data to the website, typically through a button. Usually data is sent to web server, which handles it & sends a response. Examples are: Google’s web servers will retrieve search results and send them back to the browser, as shopping site’s credit card information form will try to validate the card, etc…
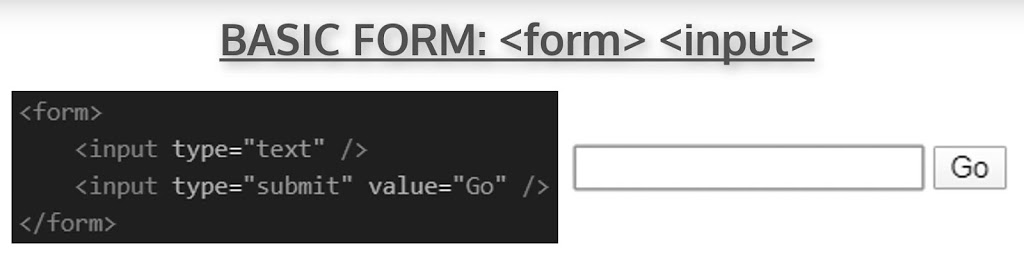
Look at this basic form and note it does not show a fully working example.
<form>
<input type=”text” />
<input type=”submit” value=”Go” />
</form>
<form> is a container element, formally defines contents as a form. <input> is a versatile element commonly used in forms.
attribute type=”text” creates text box for user input.
attribute type=”submit” creates button to submit the form.
Next to submit your form to a server you need two elements:
<form action=”URL to send data to” method=”get or post“>
The action attribute: URL on a server that should run a server-side script (a small program, such as PHP or JavaScript) to handle the form submission.
Now you need, method attribute: “get” or “post“
– “get” to send requests for data from server, such as a search query
– “post” to send data to server, both text and binary data such as images, any sensitive data that needs to be encrypted such as passwords.
input elements should always have a name attribute, which tells the server what the data is, and should be a single word with no spaces.
input elements can have a value attribute, which can be a default value to submit, also used for submit button text.
input elements can have a placeholder attribute, which puts a greyed out placeholder text in the field which can’t be submitted. It is basically a hint text to user about what to enter.
- text: default input type, single line text field.
- submit: submit button with input’s value as button text, sends form data to URL specified in form’s action attribute
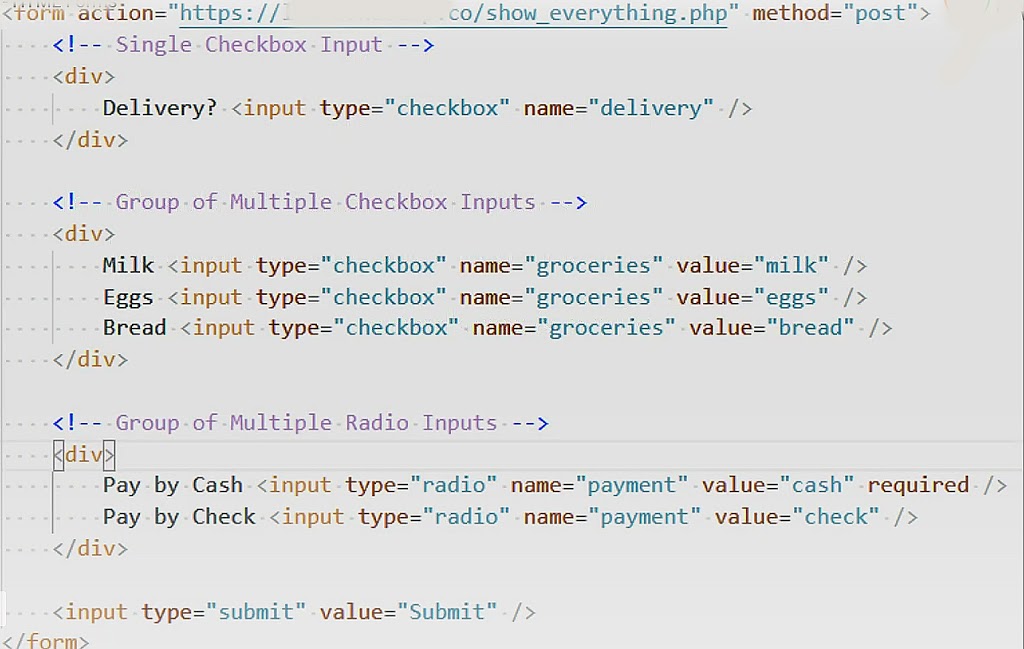
- checkbox: click to select
- Single checkbox input – no value needed
- Group of multiple checkbox inputs – value needed and names can be shared
- radio – click to select, use two or more grouped together to work. If in the same group, should have the same name but different values.
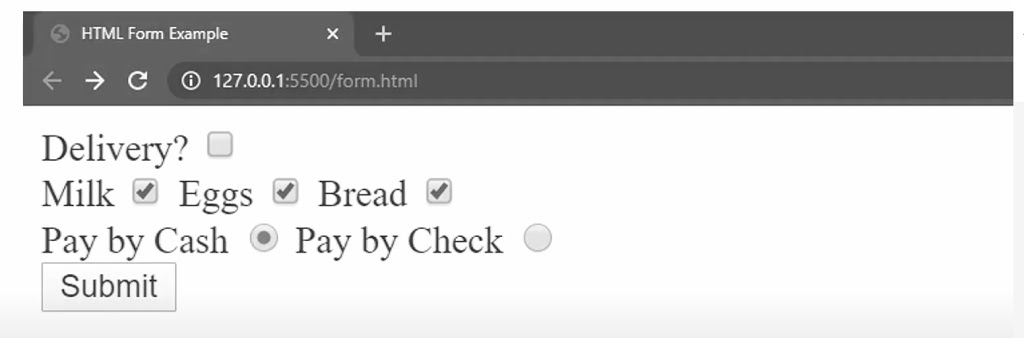
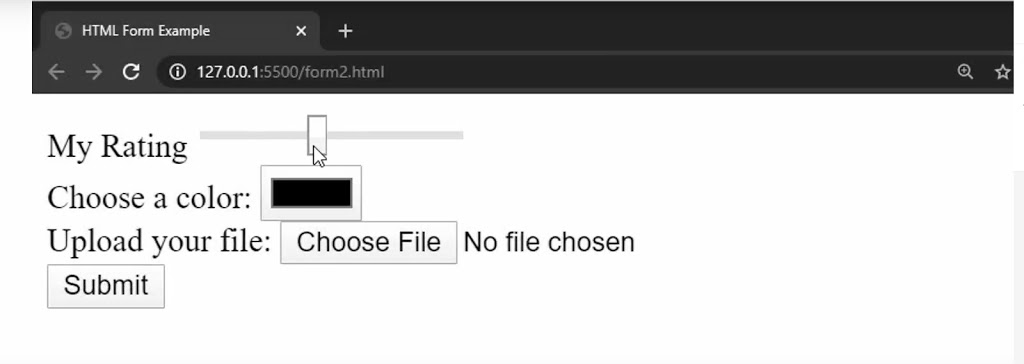
Output of code:
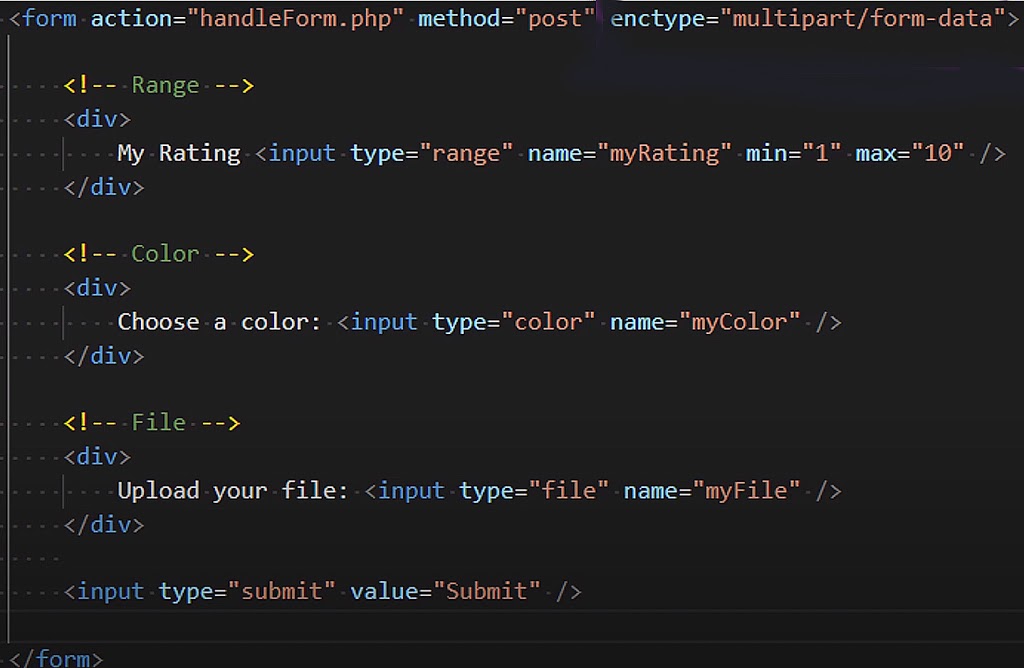
- range: slider for a range between min and max values
- color: color picker
- file: file upload (Note: When this is used, you need in the form action: enctype=“multipart/form-data”)
Output of code:
More Form ELEMENTS
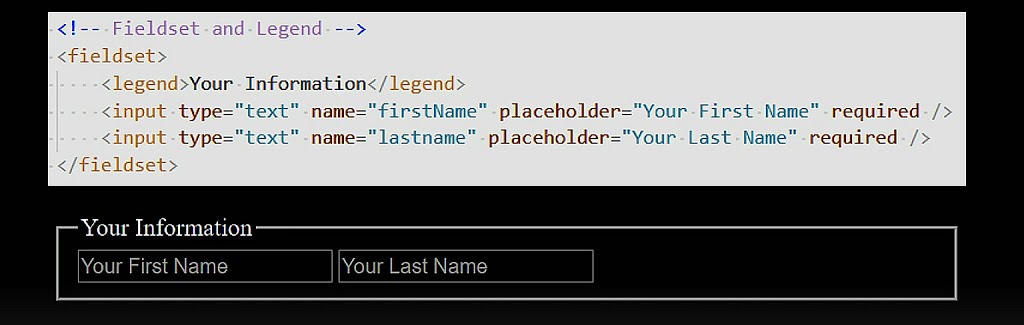
<fieldset> is used to group sets of form controls together.
<legend> is used to set a caption at the top of a <fieldset>
Look at this example below for fieldset and legend:
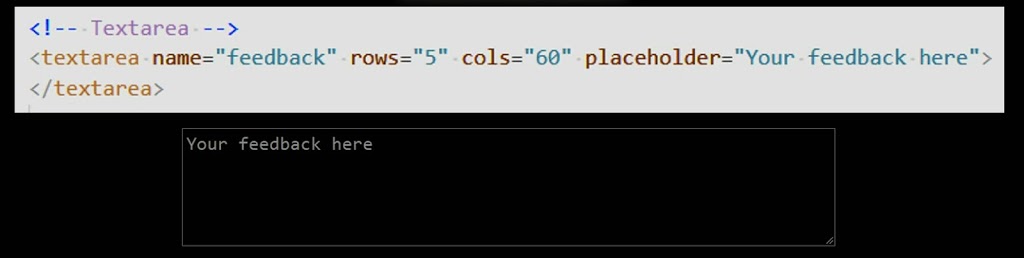
<textarea> is used for multi-line input form control. Control number of visible lines with rows attribute, width (number of characters per line) with cols attribute. Always set name attribute; can set placeholder but not value attribute; if you want default text, place between tags.
Look at this example below for <textarea>:
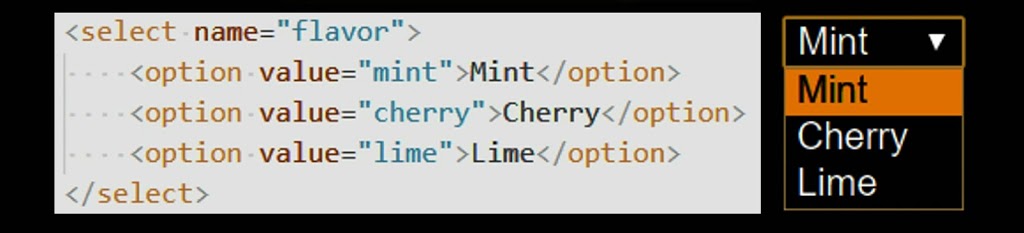
You can create a dropdown list from <select> and <option> when used together. <select> element contains a set of <option>s, requires name attribute. Each <option> surrounds a dropdown text option; each valid option requires a value attribute.
Look at this example below for a dropdownlist:
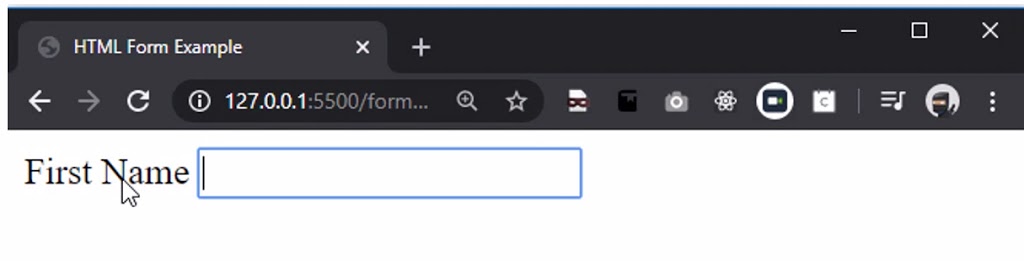
<label>
You should surround a form control’s caption text in a <label> element. Associate the label and form control by giving the label a for attribute and the form control an id attribute, then set their values to match. Then if the label is clicked or touched, the associated form control will become focused – easier to hit, more accessible.
For example look at this:
Output below. By using the label, if you click on the text you bring to focus the input field which is good for touch devices. It is best practice to use the label when possible.
Additional Resources