Bootcamp Notes – Day 2 (Tues) – Bootstrap: Node and NPM

Node and NPM
Node.js is technology that allows you to run JavaScript code directly on your computer instead of only inside a browser. NPM, the Node Package Manager, is the default package manager for Node.js. It is installed automatically when you install Node.js. What is a package manager? A package manager allows developers to download and install prepared packages that contain tools, libraries, and frameworks. It can be considered similar to Git as it is an online repository for code, but it’s not used for version tracking of development code.
To confirm which node version you are using:

node -V (To check version of Node.js)
npm -V (To check version of Node Package Manager)
For the Camp you will need Node.js 14.9.0 installed.
In the bash terminal type: npm init — (This will install NPM)
In the bash terminal type: ls –(Now you can see package.json installed)
package.json contains metadata for your project as well as scripts and information on dependencies
In the bash terminal type: code . –(This should startup VS Code editor)
So it should look something like this:
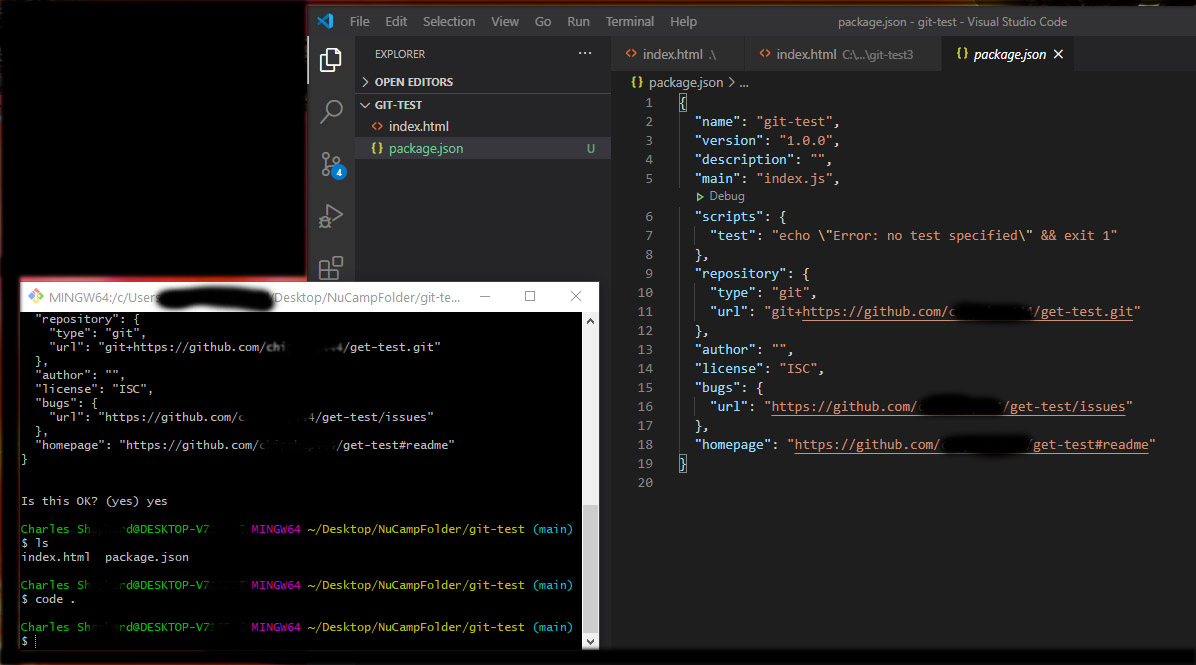
In VSCode change in the package.json “index.js” to “index.html”
In the bash terminal type: npm install lite-server@2.5.4 –save-dev
lite-server, allows you to run a lightweight, Node.js-based development web server and serve up your project files. It is a mock web server to use for testing during development, not a real web server. NOTE: the –save-dev flag means that lite-server is being installed as a development dependency, which means that later, when you build your project for deployment, it will not be included in the final build files, since it is only needed during development. More info on lite server here!
Next, open package.json in your editor and modify it as shown below.
{
  "name": "git-test",
  "version": "1.0.0",
  "description": "Git and Node",
  "main": "index.html",
  "scripts": {
    "test": "echo \"Error: no test specified\" && exit 1",
    "start": "npm run lite",
    "lite": "lite-server"
  },
  "repository": {
    "type": "git"
  },
  "author": "",
  "license": "ISC",
  "devDependencies": {
    "lite-server": "^2.5.4"
  }
}
Then start the development server by typing the following at the command prompt. Make sure you are in your project folder when you enter this: npm start
- This should open your index.html page in your default browser.
- If you now open the index.html page in VS Code, make changes and save, the browser should immediately refresh to reflect the changes.
- Create a file in your project directory named .gitignore (Note: the name starts with a period!)
- Then, using VS Code, add the following text to the .gitignore file: node_modules
- Then use the commands git add . and git commit to stage and commit the changes to your local repository, and use git push to push the changes to the linked online repository.
- Notice that the node_modules folder will not be added nor committed, and will not be pushed to the repository – Git will ignore it as if it doesn’t exist.
VS Code has an integrated terminal to open bash shell sessions.
Within the VS Code terminal make sure to select bash shell.
Then type in terminal to open you webpage in server mode: $npm start
As you make changes in VS Code your browser will update just like with Live Server.
Additional Resources:
- Official Node.js Site
- Official NPM Site
- NPM documentation
- NVM – Node version management utility (macOS)
- Why Package.json? NPM Basics
- What Is Localhost?
- lite-server
- Why Package.json? NPM Basics
- What Is Localhost?
- lite-server
- Integrated Terminal in VS Code
- Bash Commands Guide