Bootcamp Notes – Day 21 (Wed) – The Dom (Document Object Model) – Part 5 (Removing Nodes and Cloning Nodes)


The DOM – Removing Nodes
There are two methods we can use to remove a node from the DOM: remove() and removeChild()
remove()
For the remove() method you must have a reference to the exact node to remove.

nodeToRemove.remove();
removeChild()
For removeChild() you must have a reference to a parent node. This method requires an argument of the specific child for the parent to remove, such as (parentNode.firstChild);
parentNode.removeChild(parentNode.firstChild);
When you remove a node (with either remove() or removeChild(), all child nodes of the removed node are removed as well.
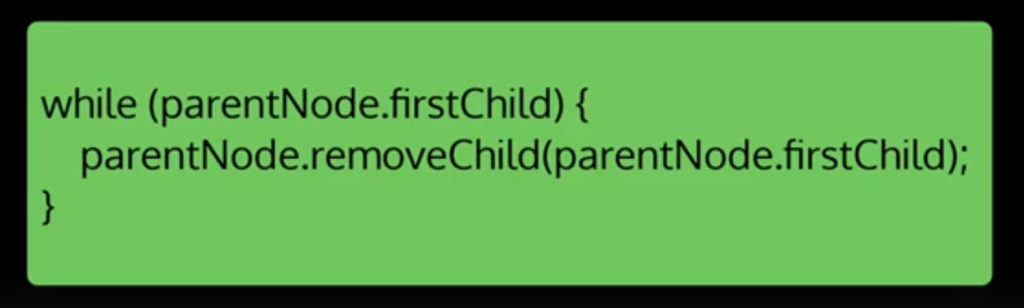
Whether you use remove or remove child, there may be times that you want to remove all the children of a node, but you don’t want to delete the actual node itself. There is a way that you can combine remove child with a while loop, to do that goes like this example below. This loop condition says that as long as the parent node has a first child then the program will enter the loop and remove the first child. If there are still any children left, the next child becomes the new first child so when this loop goes backup and checks the condition again, the condition will evaluate as true and we go back in the loop and remove that child and repeat until there are no more children of the parent node left. This is how you can remove all the children of a node without removing the node itself.
Again, this while loop below will remove all children of the parentNode, but leave the parentNode.
firstElementChild()
The firstElementChild() works in the same way as firstChild()… It will return the first element child of a node, skipping any text nodes or other kinds of nodes.
parentNode.firstElementChild
Now, let us see code for removing nodes in action. Here the demo at Codepen to view.
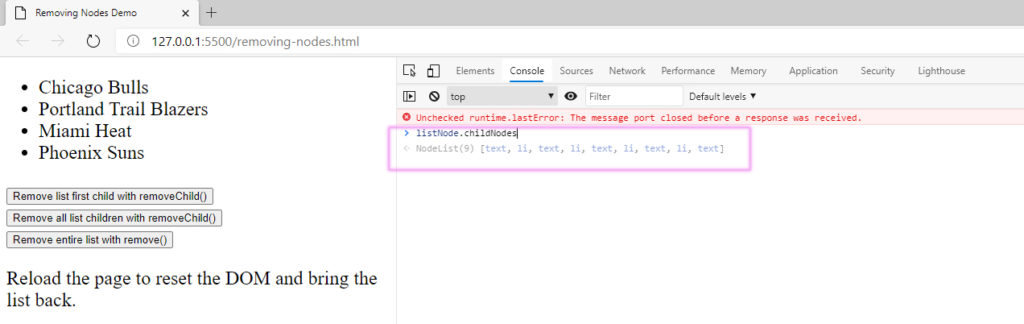
Make sure to to click the three buttons on the demo in Codpen. Now notice when you click the button for “Remove list first child with removeChild()”. Nothing happens on the first click. You have to click it again for something to work. We have a whitespace issues going on here! Will deal with that later on below.
Below will focus on the script for detail about how it works.
<script>
const listNode = document.querySelector(‘#myList’); //Locate element by it’s ID myList and storing a reference to it in this listNode variable which is being used as a global variable so that all three functions can access it.
function removeListFirstChild() { //This first function which corresponds to the first button, takes that listNode and removes its first child using the removed child method.
listNode.removeChild(listNode.firstChild);
}
function removeAllListChildren() { //This second function uses that same code inside a while loopn with the condition listNode that firstChild . That this will remove all the children of the list node, which is the UL element, so that means this code will remove other lists items inside it, not just the first one, but it won’t remove the list node itself, so the UL element will be preserved.
while (listNode.firstChild) {
listNode.removeChild(listNode.firstChild);
}
}
function removeList() { //The third function uses the remove method on the list node itself, which means that it will remove the entire node including all its children, so it removes the UL element and all the list items.
listNode.remove();
}
</script>
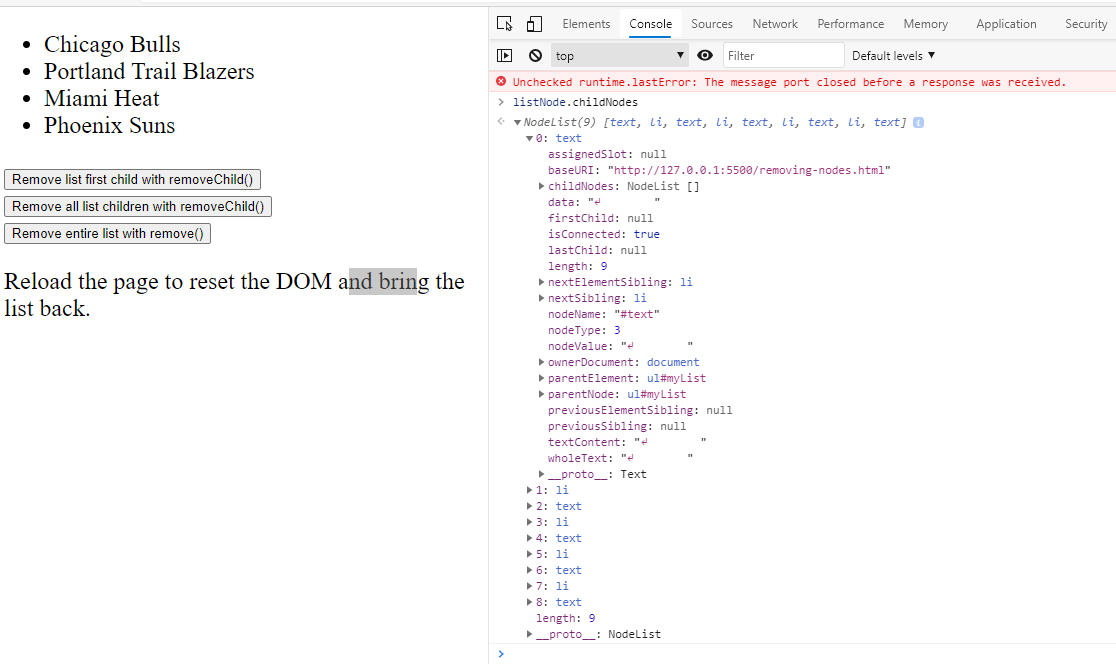
Now below, if we use the console on the code and enter: listNode.childNodes we get a node list of all the child nodes of listener and you can see that there are text notes that are siblings to the list item nodes. These text nodes are not the text that is seeing like Chicago Bulls, Portland Trail Blazers, Miami Heat, Phoenix Suns. Those text nodes are the children of the list item nodes, not siblings.
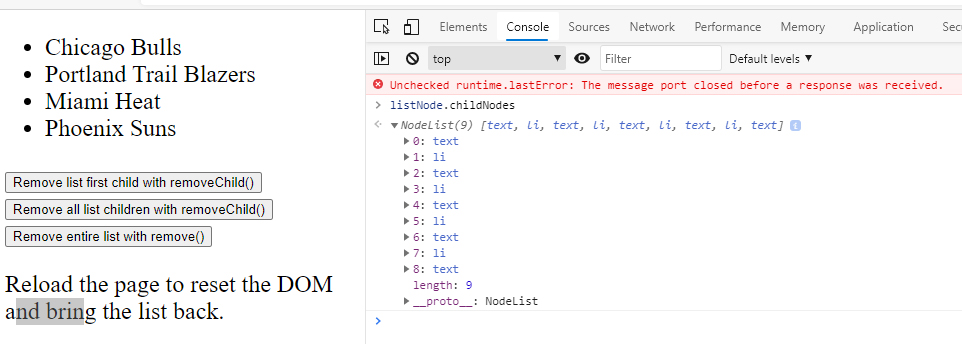
If we expand one of these text nodes, I can see that the textContent is this new line. Actually a new line plus a tab. Which is causing white space problems.
So a better way, to avoid that white space issue, is the use firstElementChild instead of firstChild in the code. Then it will be sure to remove the first list item instead of the first text node.
We go from this: listNode.removeChild(listNode.firstChild); to this: listNode.removeChild(listNode.firstElementChild); and that fixes our whitespace issue!
The DOM – Cloning Nodes
To clone a NODE is to make a copy!
For our discussion on cloning nodes, we will be using this Cloning Nodes Demo on Codepen. You can mess with it to see what it does.
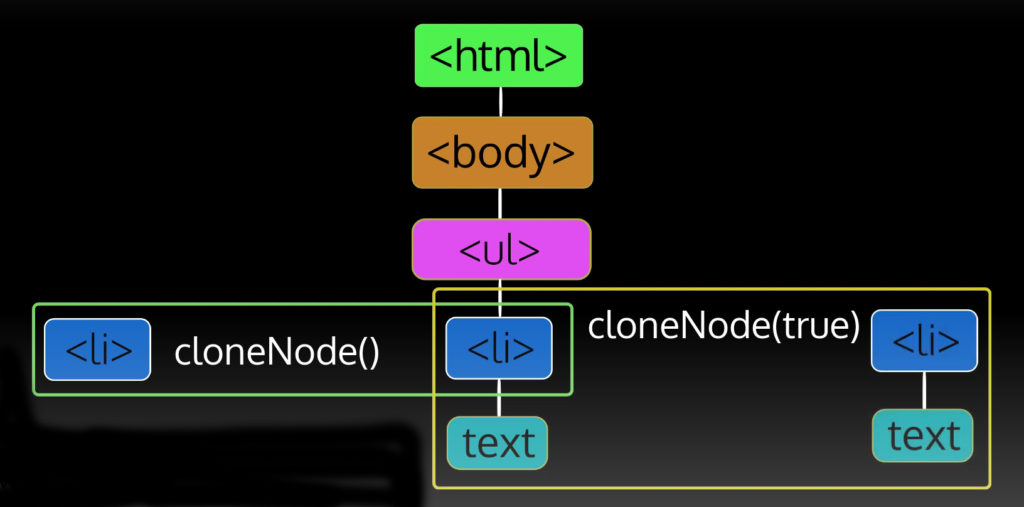
CLONING A SINGLE NODE
To clone a single node we use: cloneNode()
You must have a reference to the node to clone.
const newNode = nodeToClone.cloneNode(); —- When we use this method understand you are cloning just one node in the DOM.
In this example below, if we used cloneNode() on this list item element, you would only clone the list item element, not its child text node.
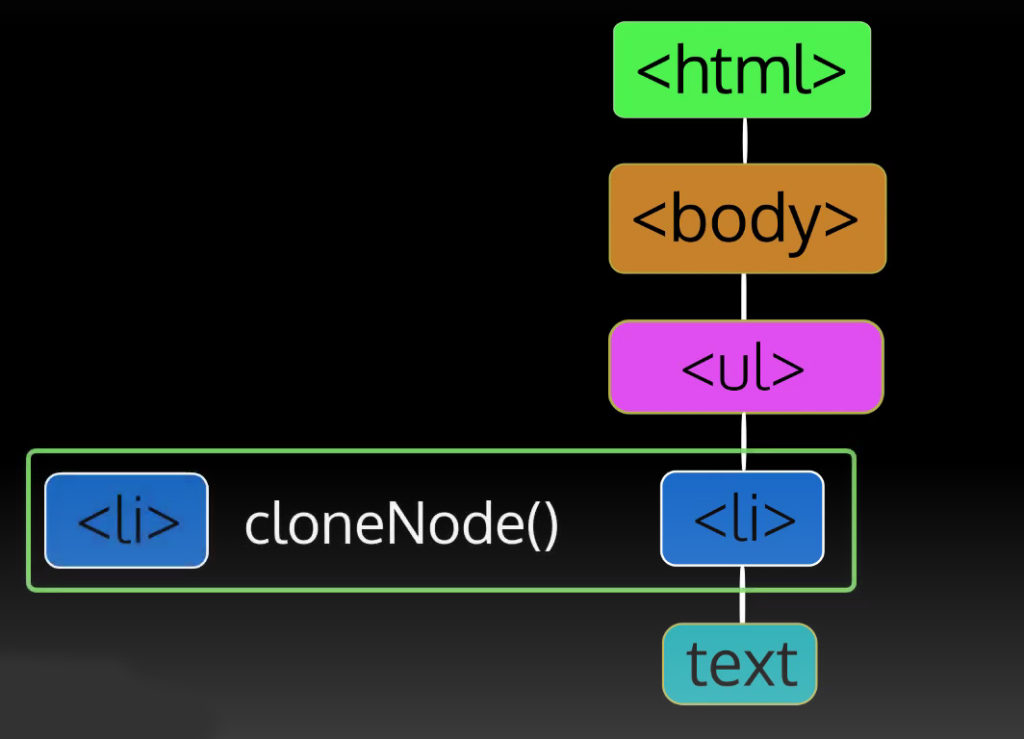
Cloning a node means that the cloned node is not attached to the DOM anywhere it’s basically floating in space. You need to explicitly tell it where to attach to the DOM using a method such as insert before or a pen child.
CLONING A BRANCH
To clone a branch cloneNode(true)
Pass the Boolean value true as an argument. This not only clones the single node but all nodes below it.
const newNode = nodeToClone.cloneNode(true);
Look at this example below. See what get’s cloned? Again, remember the clones are just floating in space and not attached to the DOM!
lastElementChild
parentNode.lastElementChild
Like firstChild/firstElementChild, this node property is a version of lastChild for elements only – skips text and other types of nodes.
Cloning Nodes Demo on Codepen.
<script>
const listNode = document.querySelector(‘#myList’);
const nodeToCopy = listNode.lastElementChild;
function cloneListItem() {
const copy = nodeToCopy.cloneNode();
listNode.appendChild(copy);
}
function cloneListItemBranch() {
const copy = nodeToCopy.cloneNode(true);
listNode.appendChild(copy);
}
</script>
Additional Resources:
- W3Schools – HTML DOM removeChild() method
- MDN – Node.removeChild()
- MDN – ChildNode.remove()
- W3Schools – HTML DOM cloneNode() method
- MDN – Node.cloneNode()