Bootcamp Notes – Day 4 (Mon) – React: Welcome to React


Welcome to React
You will begin your react course project, which will closely resemble your bootstrap course project. Along with JavaScript, React makes use of something called JSX.

JSX: HTML/XML-like syntax extension to JavaScript – breaks down to plain JavaScript objects.
You will also learn about a core concept in React, called React Components. Kinda like Bootstrap in a way! Bootstrap is mostly written in CSS, VS React being mostly written in JavaScript and JSX.
React Components: Resuseable bundles of JavaScript code to handle different parts of the UI – flexible and powerful.
You will not say goodbye to Bootstrap, because you will install Reactstrap. A third-party library that integrates Bootstrap with React.
Reactstrap: Library that converts Bootstrap components to React components.
You will also be using regular old Bootstrap in some cases as well.
OTHER KEY POINTS:
- How to store data in React component using the state object.
- How to pass data from parent to child component using the props object.
- Rednering items from arrays as lists with unique keys.
- React Developer Tools
- And more!
Upcoming Weeks you will learn about:
- Routing and Single Page Applications
- MVC and Flux Design Patterns
- Redux
- The Fetch API and JavaScript promises
- And more!
Introduction to React
Introduction to React & Front-End JavaScript Libraries and Frameworks
By now you have learned that their is the core JavaScript programming language called Vanilla JavaScript. Vanilla JavaScript is at the center of the JavaScript ecosystem. Then there are many JavaScript libraries and frameworks. Some very small and some very large. Some large to have their own ecosystems with other libraries built around them. Typically these are all open source and available online on NPM and Github. They are constantly being updated and new ones being created all the time to meet changing needs and trends. Or because people have found better ways of doing things then before. Part of being a Web Developer is being aware of the JavaScript Ecosystem as it grows and evolves.
Framework vs Library
Both Frameworks and Libraries consists of code that someone else already wrote that you can reuse.
So what differentiates a Framework and Library?
The main difference is the concept of Inversion Of Control.
Libraries: You have control – you call the library when you want to use it.
Frameworks: The framework has control and calls your code when needed. AKA: The Hollywood Principle: “Don’t call us, we’ll call you.”
Think about building something in the real world like a shed. You are probably not going to grow a tree and chop the tree down. And then make your own wooden beams. But you are more likely going to go to the hardware store and buy the lumber that is already made for you, along with your tools, paint, and whatever else you might need. You buy the pieces of the tools, and decide how to put it together. You are still in charge. A library is like a hardware store.
With a Framework, is more like starting out with a blueprint to follow or starting out with the basic frame already built. You still have to build it and fill in all the details but the basic structure and skeleton is already there!
Some popular front end JavaScript frameworks: Angular, Ember JS, Backbone JS. When use one of these frameworks, you will typically use it to architect your entire app using the blueprint they give you.
React is considered a library as well as JQuery and Lo. You can use a little of them or lot of them it is up to you!
A Brief History of React
- First developed by Jordan Walke at Facebook
- Used in 2011 for Facebook’s news feed.
- Released as open source in 2013
- Designed for speed, simplicity, scalability: speed of final product as well as speed of developing & using it.
- It is designed to help the developer write code faster.
Defining Features of React
Declarative Approach vs Imperative Approach
- Declarative: You declare what you want to see, then React handles updating the DOM in a consistent way.
- Imperative: You manipulate the DOM directly to create, insert, remove nodes and spell out every step yourself.
- React handles updating the UI in a consistent way for you, managing of adding and deleting of nodes.
- React acts a meditator between you and the DOM, which is in contrast to the imperative approach.
Component-Based Approach
- React – Encapsulates the UI into units called Components
Plays Well with Other Technologies
- React – Makes no assumptions about the rest of your tech stack – focuses on the UI and lets you decide the rest of the application architecture.
Summary: The JavaScript ecosystem includes many different frameworks and libraries of all sizes, the larger ones with ecosystems of their own. The main difference between libraries and frameworks have to do with a concept called inversion of control – you call libraries, but frameworks call you (your code). React is considered a library, and some of its defining features are that it takes a declarative, component-based approach; it’s designed for speed, simplicity, and scalability; and it plays well with other technologies.
Getting Started with React
YARN PACKAGE MANAGER
Yarn is a package manager like NPM but was created by Facebook in 2016 as an alternative to NPM.
It gives you access to the same packages as NPM, using slightly different syntax: e.g, yarn add instead of npm install
While you can use either YARN or NPM in other projects, to gain exposure to using YARN, you will use YARN in this course as well as React Native.
This will not be significantly different from how you have used npm in Bootstrap. Instead of the npm install command, you will use yarn add. When adding global packages, instead of npm install -g, you will use yarn global add. Instead of npm start, you will use yarn start.
To install Yarn:
macOS: In Terminal, from any directory, you can install Yarn using npm: npm install -g yarn
Windows: Download the installer .msi file at: https://classic.yarnpkg.com/en/docs/install#windows-stable and run it. Use the version marked “Stable”, which should be the default selected option.
Confirm that you have installed Yarn by entering the following command. You should see the Yarn version number:: yarn -v
Create-react-app
Create-react-app is a utility provided by the React team.
It will scaffold out the recommended starter files for a new React single page application.
create-react-app. It is the recommended way to scaffold out a new React single page application, especially for developers who are learning React. It already follows the best practices suggested by the React community, creates a set of starter files and folders, and along with React, it also installs and configures several tools to help you hit the ground running, such as Babel and Webpack.
It will also handle installing and configuring several background utilities such as Babel (a compiler) and Webpack (a module bundler), which help with compiling code and managing modules.
We will not need to install create-react-app; instead, we will use a tool that’s installed along with npm called npx.
npx is called a packaged runner – lets you run NPM packages without having to explicitly install them.
Useful for cases like create-react-app, which we only run once to create our project but do not need after.
- If you have installed Yarn, create-react-app will recognize that and will automatically generate starter files configured for use with Yarn.
- If you have not installed Yarn, it will by default automatically generate starter files configured for use with NPM.
So make sure you have installed Yarn before going onto next part below!
Use npx and create-react-app
- We can run create-react-app with npx, a utility that was installed along with npm, which will let us use create-react-app without having to install it.
- Open a new bash terminal inside the 3-React folder that’s inside the NucampFolder on your Desktop. Then type the following at the prompt: npx create-react-app@3.4.1 nucampsite This should create a new folder named nucampsite within your 3-React folder and scaffold out a new React application there.
- IF YOU get this EPERM: Operation not permitted, mkdir then run these two in order: yarn global add create-react-app@3.4.1 then do this: create-react-app nucampsite Note: In the future, do not create usernames with spaces in them, as this can cause some developmental tools to error because a single-word username is expected. For example, use JaneDoe instead of Jane Doe. It is not advisable to change your current username as that can frequently cause other issues.
- In your bash terminal, cd inside the nucampsite folder and use ls to list the directory contents. Make sure yarn.lock file is there!
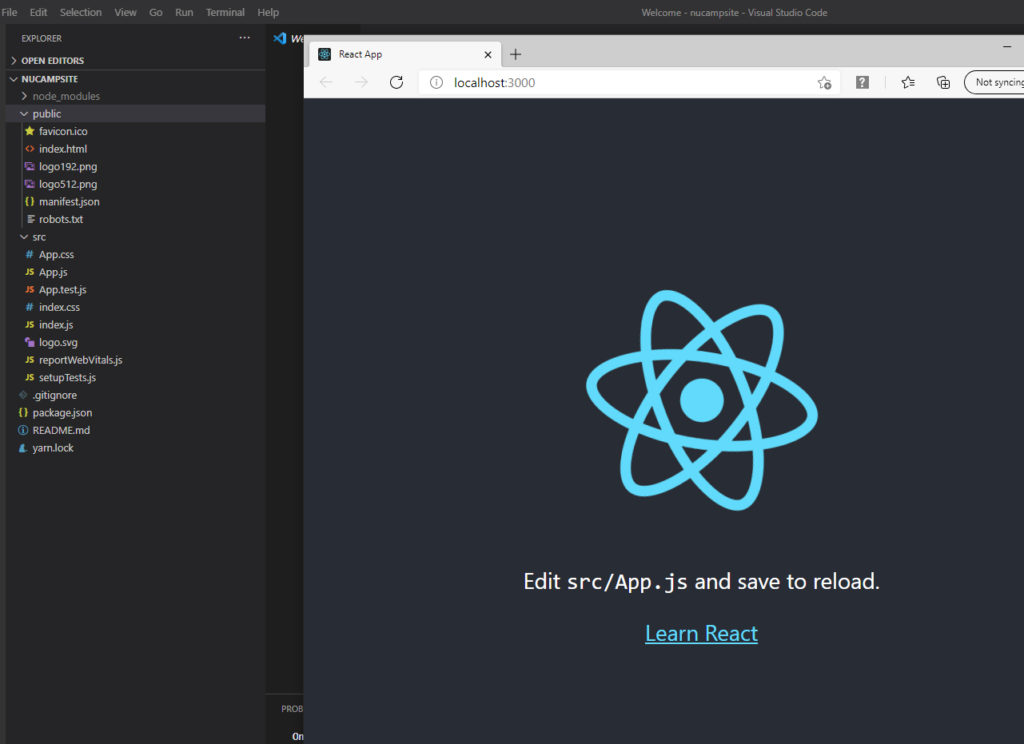
- In your bash terminal type: yarn start Note: This will compile the project, then launch a development server that create-react-app helpfully has installed for you, similar to lite-server which you used in Bootstrap. It will serve your files on that server, and will open your default browser to show your project.
- In your bash terminal type: git log Note: see that the first commit has already been made to this local repository as well. A .gitignore file has also been automatically generated for you.
- If you do not know how to display the contents of a text file while in the bash terminal, then type this command: less .gitignore
- If you wish, you can set up a new remote Git repository for your project and link your local repository to it: go here and follow these instructions.
Overview: React App Structure
We are going on a tour!
- Start VS code from the NuCampFolder/3-React/nucampsite folder.
- Now open your terminal and type: yarn start — This will start the development server.
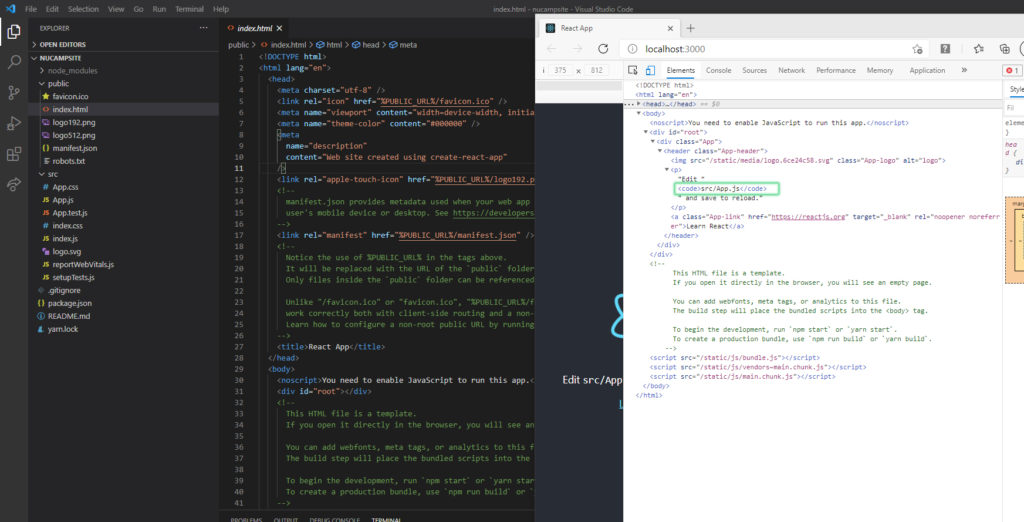
- The browser is by default the index.html file, that is in the public folder.
If you right click and view source in the browser and see them match. But now looking at the source you may see something puzzling. The content that you are seeing in the browser isn’t anywhere in this html source code. You can also see in where it says, “This html file is a template!” Also, if open the index.html file in your browser, it comes up empty. So where is the content coming from and how did it get here? The DOM is not static it is subject to being changed. The best way to see a real-time representation of the DOM is by looking at the elements tab of the developers tools.
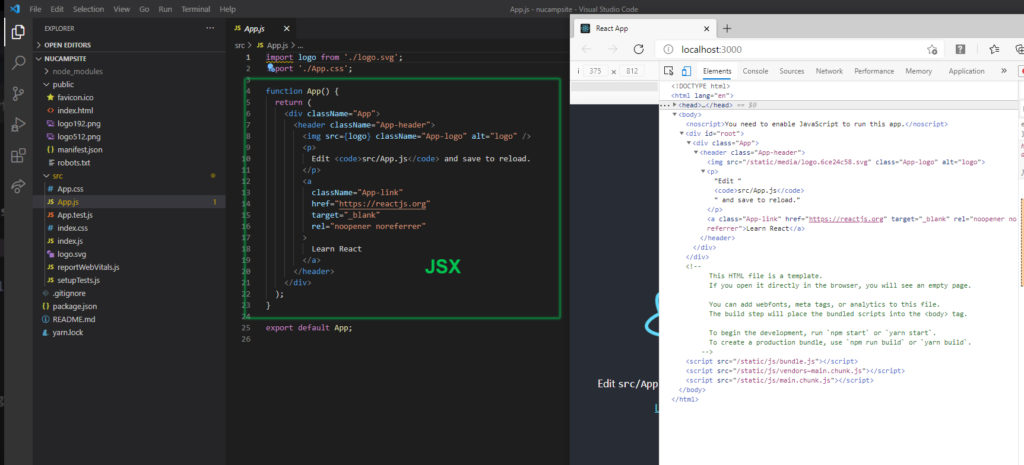
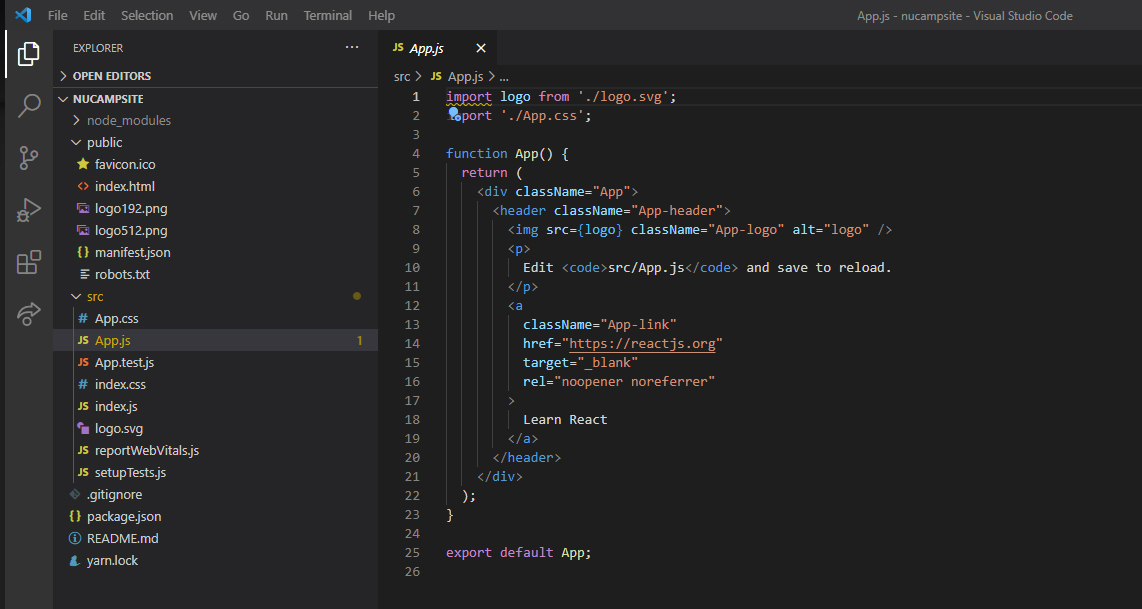
Here is JSX within the App.js file! It looks a lot like html inside JavaScript but it has some strange things going on like these {} braces and className instead of class. But, still mostly looks like HTML. But most importantly, it looks like html within index.html. But the big question is how did it get from here in app.js to index.html?
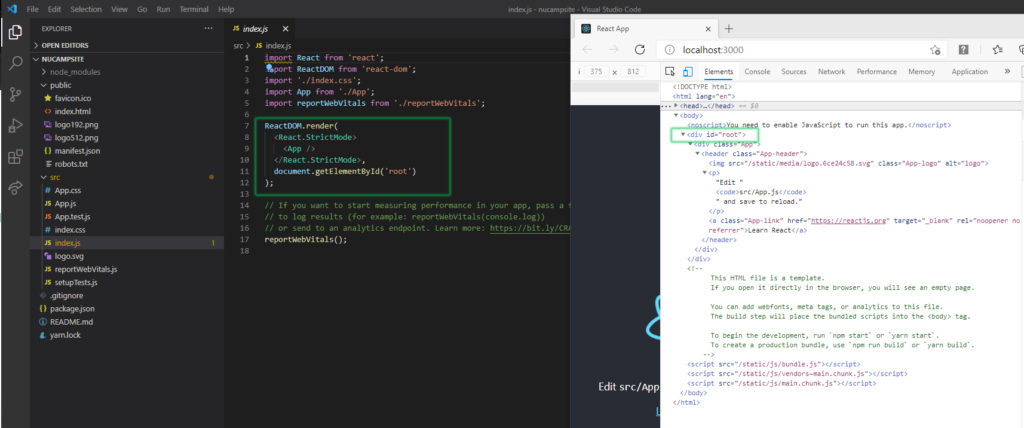
The answer is in this page: index.js Create-react-app configured index.js to work along with index.html as the main entry point. So when index.html gets pulled up the code in index.js runs too! In index.js The part to pay attention to is this line ReactDom.render. See root?
Introduction to JSX
What are html tags doing in my JavaScript? As it turns out, it’s all an illusion.
In Vanilla Javascript you may have used a built in method called:
document.createElement()
For creating new HTML elements to be inserted into the DOM using methods such as: append child.
The react library has it’s own special version of create element that can be called using:
React.createElement()
Which also creates a new html element that is specially configured to work with the react library. To use it you would write something like this:
React.createdElement(“div”, null, “Hello world!”)
This would call a method that would create a div element that contains a string called “Hello world!”
JSX is a syntactic extension to JavaScript created to help write front-end code faster.
Using JSX you can write what looks like html inside of JavaScript so you can write this: React with JSX: <div>Hello World!</div>
It is actually the the same thing. It looks like html but it is compiled right back to the react.createelement code. So it is really a handy shorthand you can use when writing react.
You can think of JSX as syntactic sugar, or a preprocessor language for JavaScript similar to SASS for CSS. JSX lets you write your code using one syntax, but before it’s sent to the browser it gets compiled to regular JavaScript. In many cases you can write JSX just like HTML. JSX is very close to HTML, with some differences. Many HTML attributes such as id and href are the same.
- Some differences: className instead of class, htmlFor instead of for – because class and for already have meaning in JavaScript.
- You can embed JavaScript expressions inside JSX using curly braces { }
- When an element has not content, you can write it as a self-closing tag in JSX.
- For example in html: <i className=”fa fa-phone”></i>
- In JSX you can write it as this: <i className=”fa fa-phone” />
For the most part JSX is very similar to HTML.
Initial Configuration
To configure your project to use reactstrap, from inside your 3-React/nucampsite project folder in your bash terminal, add the following packages:
- yarn add reactstrap@8.5.1
- yarn add react-popper@1.3.6
- yarn add bootstrap@4.5.2
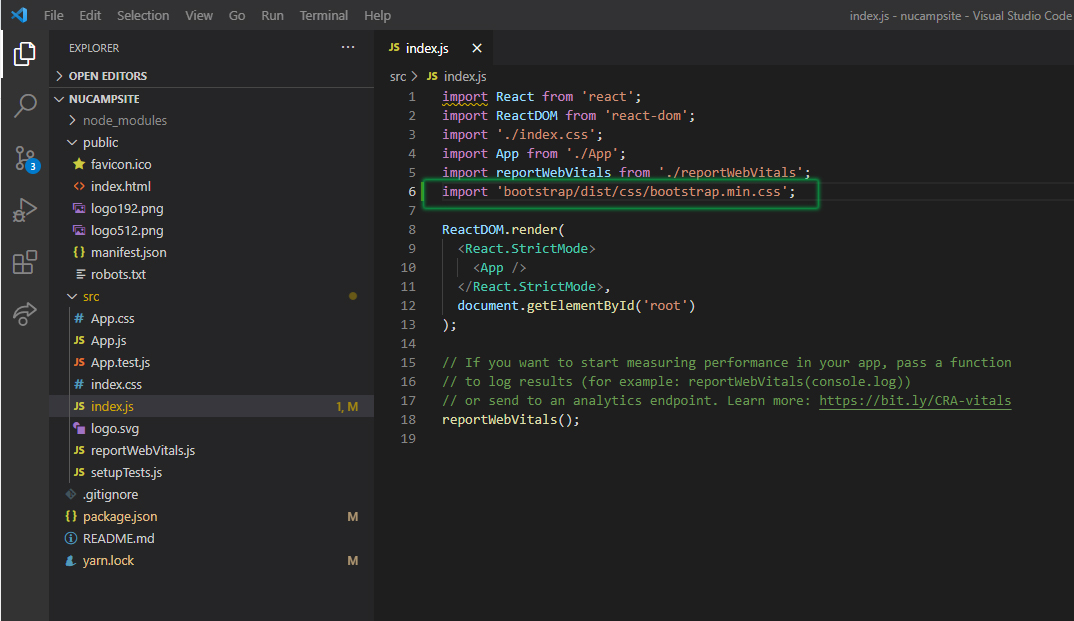
Next we configure to use Bootstrap, open index.js file in the src folder and add the following line as the last line of the imports at the top of the file: import ‘bootstrap/dist/css/bootstrap.min.css’;
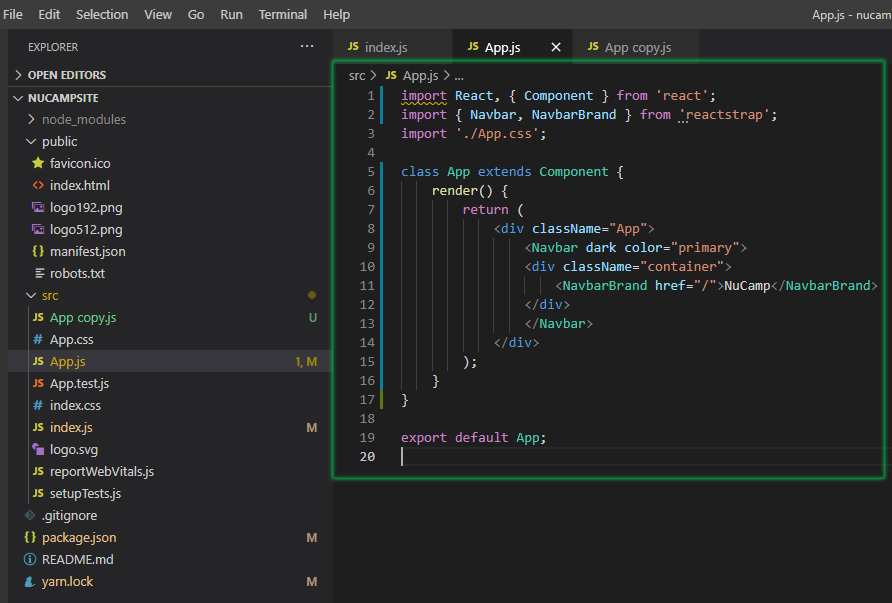
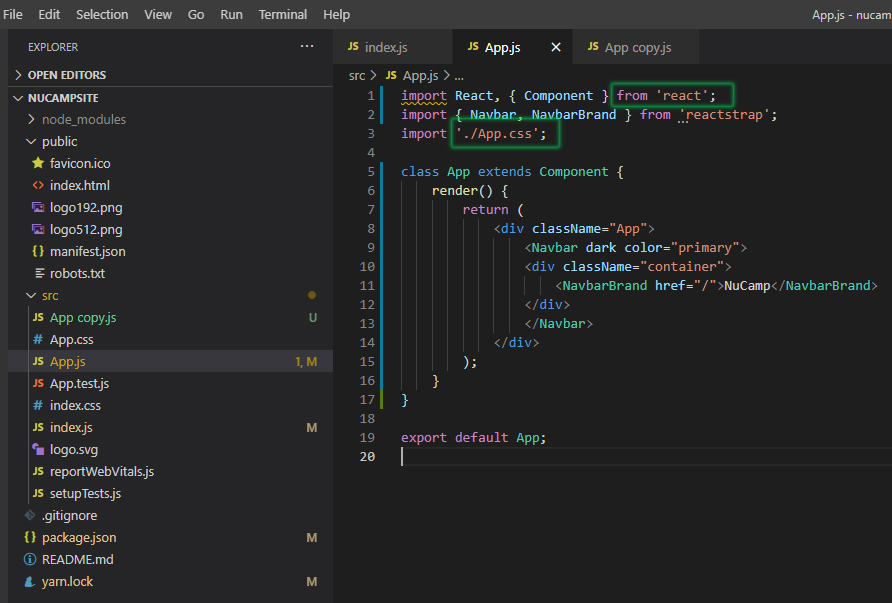
Add a navigation bar – Open App.js in the src folder and update it as follows:
- Save all the changes and test that you can see the updated app in your browser by using the terminal command yarn start or npm start.
- If you are choosing to use Git with your project, make a Git commit with the message “Configuring React”.
JavaScript Import and Export
The import and export keywords in JavaScript allow files to share data with each other. This is not a part of React, but a part of JavaScript.
The shared data can be objects, primitives, and functions (including classes).
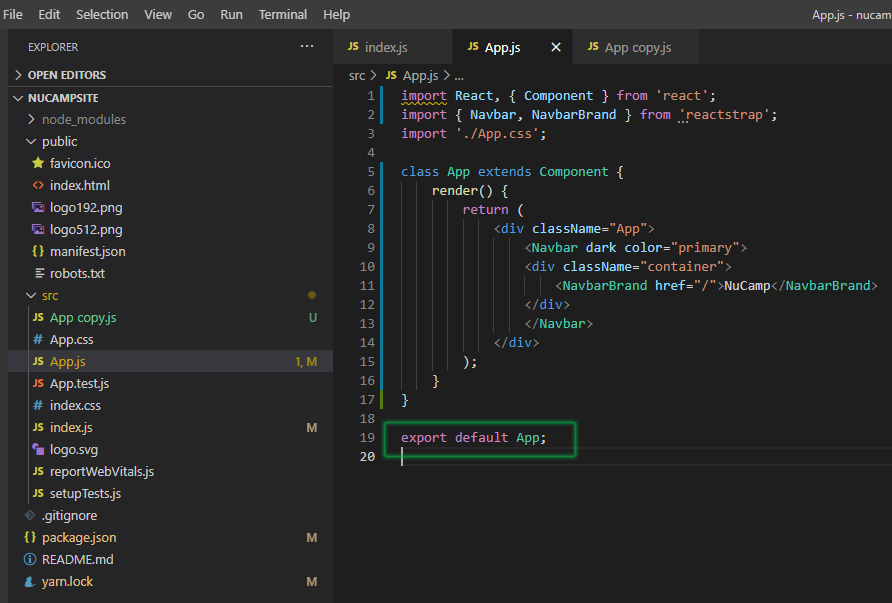
Two kinds of exports: named and default – one file can have many named exports but only one default export.
App is the default export for this. A Javascript module is a Javascript file that contains at least one export. So that means that this app.js file is a module, but index.js is not because there’s no export.
Now all these imports that are not using the dot slash in their path. They are coming from modules that are inside the node modules folder. How does this file know where to look? I mentioned before that create-react-app be default installs and configures a module bundler named webpack. Webpack is actually doing some work for you behind the scenes to make it easier to import modules. So you can just say react here and you’ll be able to go to the node modules folder and find the module in react.js there. So that’s why for the files that are not inside the node modules folder you will use ways to make it clear that you are not asking webpack to go look in the node modules folder. Like this ./Apps.css below.
Additional Resources:
- Official React website
- Hollywood Principle
- Inversion of Control
- Imperative vs Declarative Programming
- Imperative vs Declarative
- create-react-app official website
- create-react-app – a closer look
- React.js – Create React App
- Yarn Package Manager
- NPM – npx
- HackerNoon – npx: npm package runner
- React – Introducing JSX
- React – JSX In Depth
- Convert JSX using Online Babel Compiler
- Reactstrap
- Reactstrap – Navbar
- JavaScript.info – Export and Import
- MDN – Import
- MDN – Export
- React Troubleshooting
 Don’t MISS These Amazing Web Dev Videos! (STACKr News 2021, Issue #8)


