Bootcamp Notes – Day 7 (Thurs) – NodeJS: Week 2: Mongoose ODM


Mongoose ODM
Overview: Mongoose ODM
MongoDB stores data in the form of documents and it doesn’t impose any inherent structure on the documents within a database. Any document can be stored in any collection. It does not mean documents cannot have any structure. It means it is up to us (the developer) to choose if, when, and how we impose that structure. If we wish to programmatically enforce a predefined structure for a MongoDB collection, one way to do so is through an NPM library called Mongoose.
ODM stands for: Object Data Model or Object Document Mapper/Mapping

Mongoose describes itself as: “elegant mongodb object modeling for node.js”
Mongoose is built on top of MongoDb Node.js Driver and wraps around that APi. For example, once you’ve installed and required Mongoose in your project you will then use mongoose.connect() method to connect to the MongoDB server instead of the MongoClient.connect() method. But mongoose’s connect method is actually using the Mongo client connect method behind the scenes. If the concept of an APi that wraps around another APi isn’t completely clear to you, think of it the same way as how the Express api wraps around Node’s core http module. Or even how back in the node and Mongodb and callback hell exercises that we just did. We wrote our own methods like insert documents that wrapped around the MongoDB note drivers APi, we are eventually using the same code, but adding some extras along the way, Once again, Mongoose is used to enforce a predefined structure for documents within a particular MongoDB collection.
Let us see a general overview of how Mongoose does this and afterward we will go into these specifics.
MONGOOSE SCHEMAS & MODELS
First we define a Schema which contains information about document structure. For example what fields are required, what the date types of the fields should be and so on. Then we generate a Model for a Schema + a specific MongoDB collection. Then that Model is used to instantiate new documents for that collection. This is done in basically the same way as how JavaScript classes are used to instantiate new objects. The Model will enforce structure from Schema & validate documents. The Model is also used to interact with documents through static methods, which are a concept in JavaScript, that will talk later about.
MONGOOSE SCHEMA
Schema’s contain information about the structure of a document, but practically speaking what are schemas? Schema’s are created as JavaScript objects.
Here is an example of a Schema:
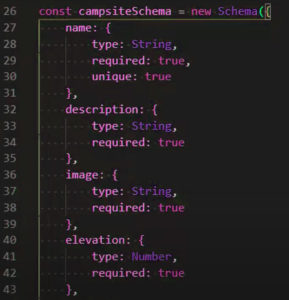
Using the object properties we can predefine the fields for a document, such as name, description, and so on. Then we can configure those fields to have Mongoose automatically validate them. A Schema instance is an object whose properties pre-define fields of a document. Mongoose will validate documents, and will throw an error if we then use the wrong type of data when creating a document.
Schema data types supported in Mongoose include: String, Number, Date, Buffer, Boolean, Mixed, ObjectId, Array, Decimal128, Map
Other configurations we can set for a documents fields include whether a field is required or not and whether it should be unique within a collection or not, so that for example we don’t have more than one document with the same value for their name filled within the same collection. We can set minimum and maximum values for number type fields. We can set fields to have default values, if none are passed in and so on. Schema’s also support nesting so that you can have what mongoose calls a sub document inside another document. For example, you could have a schema for a comments document as a sub-document inside the campsites document.
USING SCHEMAS
Once you have defined a Schema, you can use it to create a Model. The Model will copy the Schema and use it when creating new documents.
Next we will cover models, on how to create them, what they are, and how they are used.
CREATING A MODEL
Now will cover how a model is created for particular collection and Schema.
Create a new Model with the mongoose.mode() method, passing a name that will be used to figure out the collection this Model will be used for, and the Schema to use.
- The first argument should be the capitalized, singular version of the MongoDB collection name this Model is for
For example, if you want this model to be used for a collection named campsites then this argument should be campsite with the C in uppercase and the S dropped from the end.
const Campsite = mongoose.model(‘Campsite’, campsiteSchema)
Mongoose will automatically figure out the plural, lower case version and look for the corresponding collection. It is important that you follow this convention, otherwise your model will not get synced up to the right collection. In most cases the const variable name and this first argument should match as you see in the example above. So that is how you create a model.
WHAT IS A MODEL?
The model is created as what is called a constructor function, which are basically the sugared version of ES6 classes. Remember that classes in JavaScript were added in ES6 as syntactic sugar and constructor functions are what they are sugar for. Mongoose was written before ES6, so it uses constructor functions instead of classes. Just remember, while models are not technically JavaScript classes, they work basically the same way as classes and you can think of them as such. Like a class is used to instantiate new objects, Models are used to instantiate new documents.
USING MODELS: INSTANTIATING NEW DOCUMENTS
Instantiating a new document from a Model example syntax:
const campsite = new Campsite({ name: ‘React Lake Campground’, description: ‘test’ })
The model has a copy of the Schema that the Model was created with and it will use that schema to perform validation on the new document and it will also insert the document into the corresponding collection.
USING MODELS: INTERACT WITH DOCUMENTS
Models are also used to interact with their instances. This is done through what is called static methods. Models have static methods for accessing all instances of the Model. Static methods are a programming concept where methods are accessed through the class or constructor function, rather than through the instance of the class.
Some examples of static methods of model are: .find(), ,deleteOne(), countDocuments() and many others all listed in the Mongoose APi documentation. For example, if you wanted to find all the documents that were instantiated from the campsite model, you can say: Campsite.find()
There are also Mongoose model methods, that work directly on instances of models that is documents, rather than on the model class itself. In the APi documentation, the way to tell them apart is to look for the ones that say Model.prototype then the method name. Those are the ones that work on instances. The ones that do not say prototype are static methods.
Mongoose ODM Part 1
- Install Mongoose ODM and connect to a MongoDB server.
- Learn how to define Mongoose schemas, then use them to define Mongoose models.
- Learn to perform database operations with Mongoose methods.
Install Mongoose
- From inside the course folder (5-NodeJS-Express-MongoDB), create a new subfolder named node-mongoose and open that folder in VS Code.
- Create a package.json file in the node-mongoose folder with the content as follows:
{
  "name": "node-mongoose",
  "version": "1.0.0",
  "description": "",
  "main": "index.js",
  "scripts": {
    "test": "echo \"Error: no test specified\" && exit 1",
    "start": "node index"
  }
}
- Optional: If you are using nodemon, update the start script accordingly.
- In this folder, install Mongoose by typing the following at the prompt: npm install mongoose@5.10.9
Implement a Node application
- Create a sub-folder named models in the node-mongoose folder.
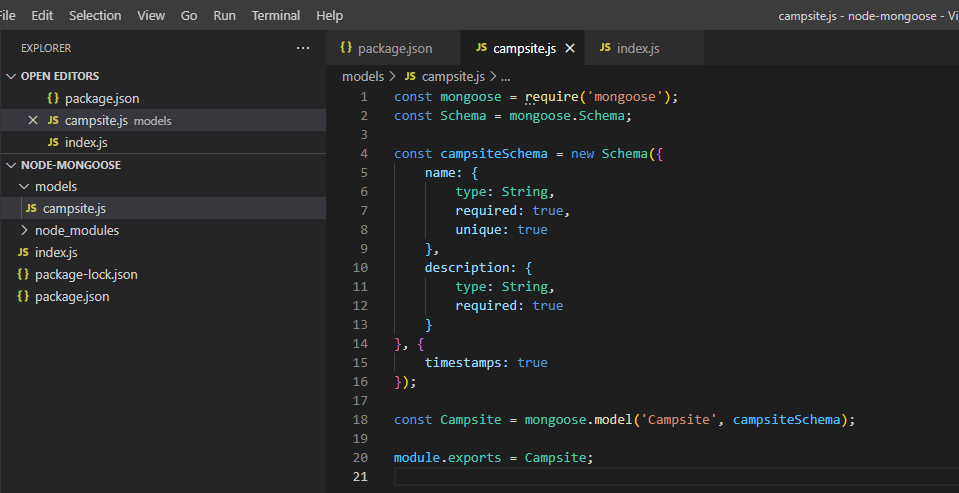
- Create a file in the models folder named campsite.js and add the following code to create a Mongoose schema:
const mongoose = require('mongoose');
const Schema = mongoose.Schema;

const campsiteSchema = new Schema({
    name: {
        type: String,
        required: true,
        unique: true
    },
    description: {
        type: String,
        required: true
    }
}, {
    timestamps: true
});

const Campsite = mongoose.model('Campsite', campsiteSchema);

module.exports = Campsite;
- In the node-mongoose folder, create a file named index.js with the following code:
const mongoose = require('mongoose');
const Campsite = require('./models/campsite');

const url = 'mongodb://localhost:27017/nucampsite';
const connect = mongoose.connect(url, {
    useCreateIndex: true,
    useNewUrlParser: true,
    useUnifiedTopology: true
});

connect.then(() => {

    console.log('Connected correctly to server');

    const newCampsite = new Campsite({
        name: 'React Lake Campground',
        description: 'test'
    });

    newCampsite.save()
    .then(campsite => {
        console.log(campsite);
        return Campsite.find();
    })
    .then(campsites => {
        console.log(campsites);
        return Campsite.deleteMany();
    })
    .then(() => {
        return mongoose.connection.close();
    })
    .catch(err => {
        console.log(err);
        mongoose.connection.close();
    });
});
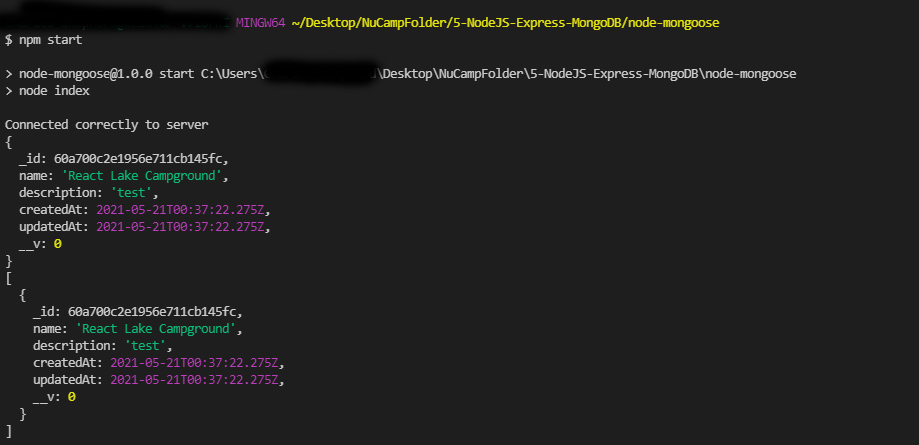
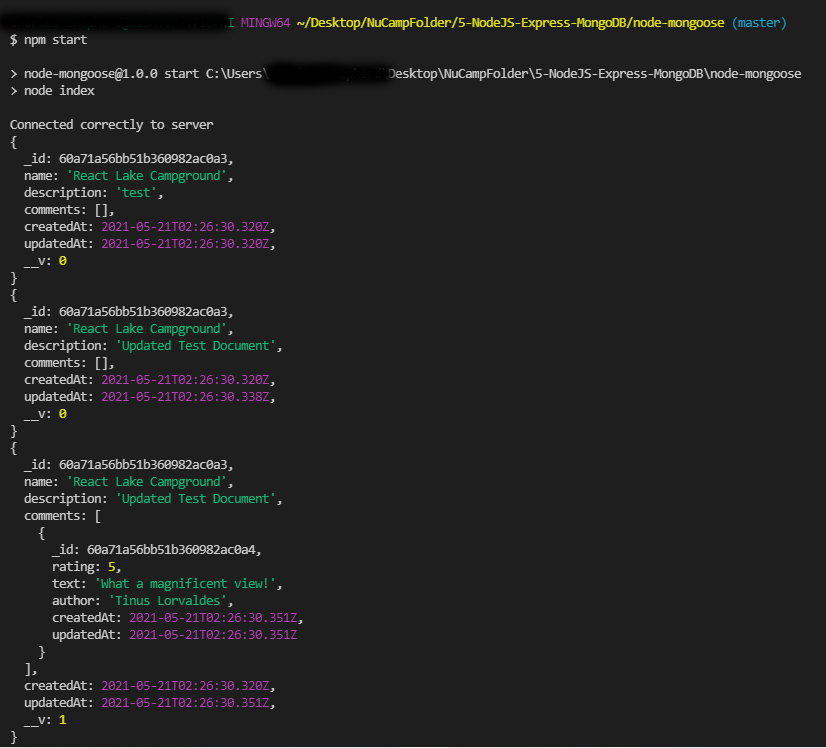
- Make sure that your MongoDB server is up and running. Then at the terminal prompt type (inside the node-mongoose folder), enter npm start to start the server and see the result.
- Optional:
- If using Git, create a .gitignore file with the text content of node_modules in the node-mongoose folder.
- Initialize a Git repository and commit your files with the message “Mongoose Part 1”.
Mongoose ODM Parts 2 & 3
- Learn about creating Mongoose schemas and subdocuments.
- Perform database operations to the MongoDB using Mongoose methods.
Part 2: Mongoose operations
- In the node-mongoose folder, update index.js as follows:
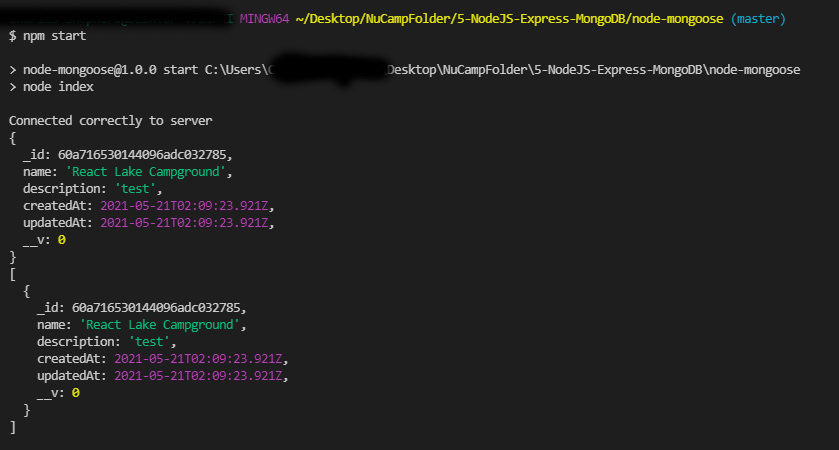
- Run this server on the console and observe the result.
- Optional: Commit changes to Git with the message “Mongoose Part 2”.
Part 3: Add subdocuments to a document
- Update campsite.js in the models folder as follows:
- Update index.js as follows:
- Run the server and observe the result.
- Optional: Commit changes to Git with the message “Mongoose Part 3”.
Additional Features:
- Mongoose
- Mongoose chat community on Gitter
- CSS-Tricks – Understanding JavaScript Constructors
- MDN – Static
- Mongoose
- Mongoose – Deprecations
- TutsPlus – An Introduction to Mongoose for MongoDB and Node.js
- Heroku Dev Center – Object Modeling in Node.js with Mongoose
- Mongoose – Guides: Schemas
- Mongoose – Guides: Subdocuments
- Mongoose – Deprecations: FindAndModify