Bootcamp Notes – Day 2 (Tues) – React Native: Week 1: React Native Components

React Native Components
Overview: React Native Components
In the React course you learned about React Components.
- functional and class components
- presentational and container components
- How to set local component state, passing props to child components
- rendering the view with JSX tags and attributes
- embedding JavaScript inside JSX with curly braces
- lifecycle methods and more
Aside from no longer HTML elements, you will use React Native components just like React Components. So all that stuff you learned in React will carry over to React Native.
REACT NATIVE COMPONENTS
You learned just recently that we will use new UI components like <View> and <Text> to design our User Interface. React Native eventually takes these components and maps them into the corresponding native UI components for both Android and iOS.
Whatever components we use in React Native there will be a corresponding native component in both android and iOS.
Just like React, we are not limited to just built-in components that come with React Native. There are many third-party React Native libraries with components and tools we can use. Including a library for routing, a library for Redux with React Native and more!
The first third-party library that we will install and use is a popular one called React Native Elements library.
The aim of React Native Elements is to provide an all-in-one UI kit for creating apps in react native. There are many great ui components made by developers all around open source. React Native Elements takes the hassle of assembling these packages together by giving you a ready made kit with consistent api and look and feel.
A note on warning messages
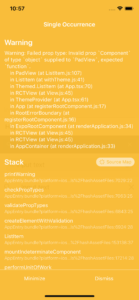
While working with React Native, it is common to see a yellow warning on your device or emulator that when expanded, looks similar to this (though the text may differ):

Generally, you can ignore any yellow warning messages during this course. Warnings indicate non-breaking issues and are commonly encountered in development. If there are any particular warning messages you do need to be concerned about, we will let you know. Otherwise, it is fine to ignore the yellow warning messages.
On the other hand, if you see a red error message, then you will most likely need to troubleshoot before you can move on.
You have the option to disable the display of yellow warning messages. This is not always recommended since warning messages can be helpful in some cases. If you wish to disable the warning messages, you can include this line below the imports inside your App.js file: console.disableYellowBox = true;
For more information on the console.disableYellowBox option, click here.
React Native Components Part 1
- Install a commonly used third party library called React Native Elements (RNE).
- Use UI components from both React Native’s set of built-in components and RNE to begin building the UI for your app.
We will begin to build up our React Native app from the starter files, using React Native’s built-in components along with components from React Native Elements (RNE).
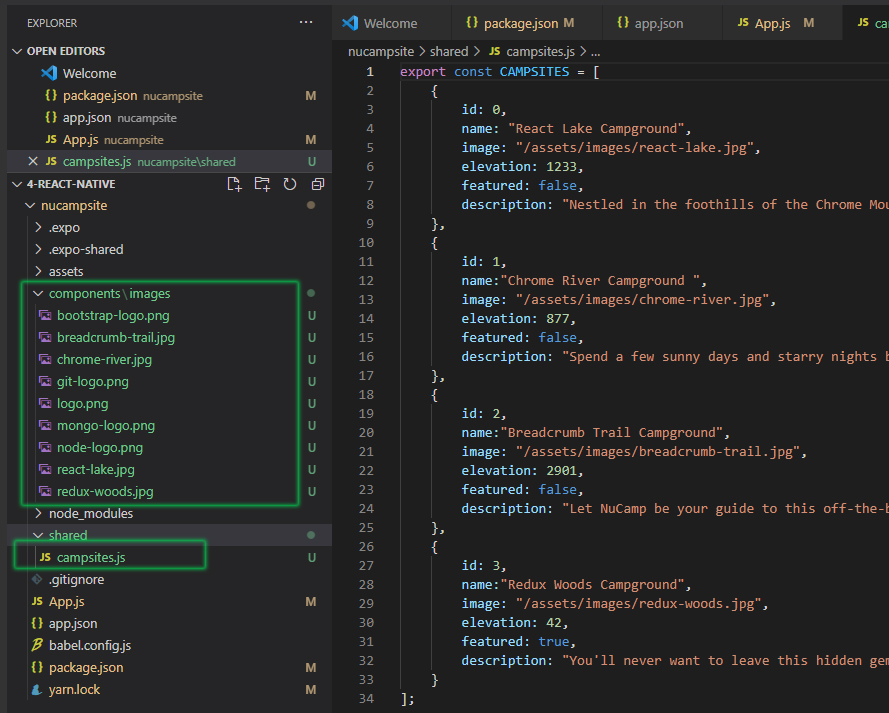
We will be building the same fictional campsites review app from Bootstrap and React. Make sure these are added in. You can get them from your previous project.

- To install React Native/Expo packages into your Expo-managed project, we will use the command expo install. This command wraps around yarn/npm and does some automatic checking for versions compatible with your installed Expo SDK.
- We’ll use it now to Install React Native Elements (RNE). This library provides us with many useful UI components.
- From your integrated terminal in VS Code, which should be inside the nucampsite folder, enter: expo install react-native-elements@2.2.1
Add a new file named MainComponent.js in the components folder. Inside this file, add the following code:
import React, { Component } from 'react';
import Directory from './DirectoryComponent';
import { CAMPSITES } from '../shared/campsites';

class Main extends Component {
    constructor(props) {
        super(props);
        this.state = {
            campsites: CAMPSITES
        };
    }

    render() {
        return <Directory campsites={this.state.campsites} />;
    }
}

export default Main;
Then, add another file named DirectoryComponent.js in the components folder and update it as follows:
import React from 'react';
import { FlatList } from 'react-native';
import { ListItem } from 'react-native-elements';

function Directory(props) {

    const renderDirectoryItem = ({item}) => {
        return (
            <ListItem
                title={item.name}
                subtitle={item.description}
                leftAvatar={{ source: require('./images/react-lake.jpg')}}
            />
        );
    };

    return (
        <FlatList
            data={props.campsites}
            renderItem={renderDirectoryItem}
            keyExtractor={item => item.id.toString()}
        />
    );
}

export default Directory; Next, update App.js as follows:
import React from 'react';
import Main from './components/MainComponent';
export default function App() {
return (
<Main />
);
}- Run expo start in your terminal from inside your 4-React-Native/nucampsite folder. After a moment, this should open a browser window to http://localhost:19002. If it does not, then go to that address in your browser yourself.
- You should see a “Run on Android device or emulator” option in the left sidebar of your browser. Load your Android emulator (AVD) if it is not already running, or connect your Android device if you are using a device instead of the emulator. Then click on the link to run the Expo app in your device or emulator.
- The Expo client should start on your AVD or device. Once it has fully loaded, confirm that it shows the Directory component, which lists all the campsites in the campsites.js file.
React Native Components Part 2
- Add a new component, CampsiteInfo, which will display more information when a campsite is selected from the Directory component.
- Practice updating state with React’s setState().
- Learn to respond to user interactions with the UI using a custom event handler, along with the RNE ListItem component’s onPress prop.
Add a file named CampsiteInfoComponent.js in the components folder and add the following to it:
import React from 'react';
import { Text, View } from 'react-native';
import { Card } from 'react-native-elements';

function RenderCampsite({campsite}) {
    if (campsite) {
        return (
            <Card
                featuredTitle={campsite.name}
                image={require('./images/react-lake.jpg')}
            >
                <Text style={{margin: 10}}>
                    {campsite.description}
                </Text>
            </Card>
        );
    }
    return <View />;
}

function CampsiteInfo(props) {
    return <RenderCampsite campsite={props.campsite} />;
}

export default CampsiteInfo;
MainComponent.js
DirectoryComponent.js
Additional Resources:
- React Native Components and APIs
- React Native Elements (RNE)
- React Native Internals
- React Native – Text, View
- Android – TextView
- iOS – UIView
- React Native Elements
- React Native Elements Github Repository
- React Native – Flatlist
- RNE – ListItem
- Medium.com article – How To Use the FlatList Component
- RNE – ListItem – onPress prop
- RNE – Card
- React Native Layout Props – Flex
- React Native Flexbox
- React – State and Lifecycle
- React – Passing Arguments to Event Handlers
- RNE – ListItem – onPress prop
- RNE – Card
- React Native Layout Props – Flex
- React Native Flexbox
- React – State and Lifecycle
- React – Passing Arguments to Event Handlers


