Bootcamp Notes – Day 3 (Wed) – React Native: Week 1: React Native Navigation

React Native Navigation
Overview: Navigation in React Native
A typical mobile app consists of multiple views or multiple screens and you need a way of navigating from one screen to another and maybe even returning to a previous screen. In React we used the React Router library to provide navigation between the views of a single page web app. A mobile device has its own navigation styles that need to be supported, different from browser navigation. For this we will be using another third-party library called React Navigation and this is the navigation library that’s officially recommended by React Native.
React Navigation provides a straightforward navigation solution, with the ability to present common stack navigation and tabbed navigation patterns on both Android and iOS.
We will be using side drawer-navigator and stack-navigator.
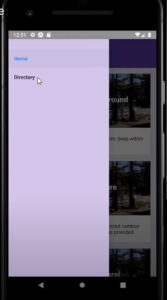
drawer-navigator (Makes available what is called a side drawer, where through swiping on the screen, we can cause a drawer to appear from the side of the screen.)

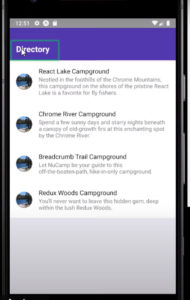
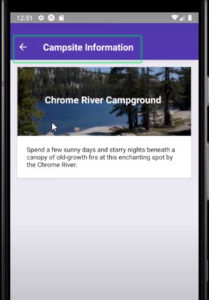
stack-navigator (This wraps around the different views of our app and keeps track of our view history and adds a header to each view. It adds a back arrow! It keeps tracks of view via an internal stack, so when we go to a new view, it puts that view on the top of the stack. Then when we go back, with either the back arrow or even the hardware back button, it pops the current view off the stack and it takes you back to the last view that is now at the top of the stack )


Besides drawer-navigator and stack-navigator, react navigation also supports a few other types of navigators. React Navigation also supports creating your own custom navigators as well!
Navigation Part 1
- Install the react-navigation library and learn to use it to create and configure a StackNavigator for the Directory and CampsiteInfo components.
- Learn about react-navigation’s navigation prop, and use it to control navigating from the Directory to a selected CampsiteInfo component using params.
- Learn a typical way to separate code for iOS and Android platforms.
Install React Navigation!
- With your terminal open to your project folder, install React Navigation and its dependencies into your project with the following command: expo install react-navigation@4
- React Navigation is installed with the above core package, then a set of dependencies that are installed as needed. We will need the following dependencies to be installed also at this time: expo install react-native-gesture-handler react-native-reanimated react-native-screens react-native-safe-area-context @react-native-community/masked-view react-navigation-stack@^1.10.3
MainComponent.j
DirectoryComponent.js
CampsiteInfoComponent.js
Navigation Part 2
- Configure your application with drawer-based navigation using the react-native library’s Drawer Navigator.
- Add the Home component to the app, along with its own StackNavigator.
Install react-navigation-drawer
- Enter the following command into your terminal, inside your project folder: expo install react-navigation-drawer
Add a new file named HomeComponent.jsin the components folder:
import React, { Component } from 'react';
import { View, Text } from 'react-native';

class Home extends Component {

    static navigationOptions = {
        title: 'Home'
    }

    render() {
        return (
            <View>
                <Text>Home Component</Text>
            </View>
        );
    }
}

export default Home; MainComponent.js Home Component
One major difference between ScrollView and Flatlist:
ScrollView loads all its child components at once: FlatList uses Lazy Loading.
Lazy Loading means only a part of a list is rendered at a time, the part that’s on-screen or about to be. The parts that have scrolled far off screen are removed from memory. This improves performance, and is more efficient for longer lists.
Add these files from your React Projects shared folder to your shared folder:
import React, { Component } from 'react';
import { View, Text, ScrollView } from 'react-native';
import { Card } from 'react-native-elements';
import { CAMPSITES } from '../shared/campsites';
import { PROMOTIONS } from '../shared/promotions';
import { PARTNERS } from '../shared/partners';

function RenderItem({item}) {
    if (item) {
        return (
            <Card
                featuredTitle={item.name}
                image={require('./images/react-lake.jpg')}
            >
                <Text style={{margin: 10}}>
                    {item.description}
                </Text>
            </Card>
        );
    }
    return <View />;
}

class Home extends Component {

    constructor(props) {
        super(props);
        this.state = {
            campsites: CAMPSITES,
            promotions: PROMOTIONS,
            partners: PARTNERS
        };
    }

    static navigationOptions = {
        title: 'Home'
    }

    render() {
        return (
            <ScrollView>
                <RenderItem
                    item={this.state.campsites.filter(campsite => campsite.featured)[0]}
                />
                <RenderItem
                    item={this.state.promotions.filter(promotion => promotion.featured)[0]}
                />
                <RenderItem
                    item={this.state.partners.filter(partner => partner.featured)[0]}
                />
            </ScrollView>
        );
    }
}

export default Home;

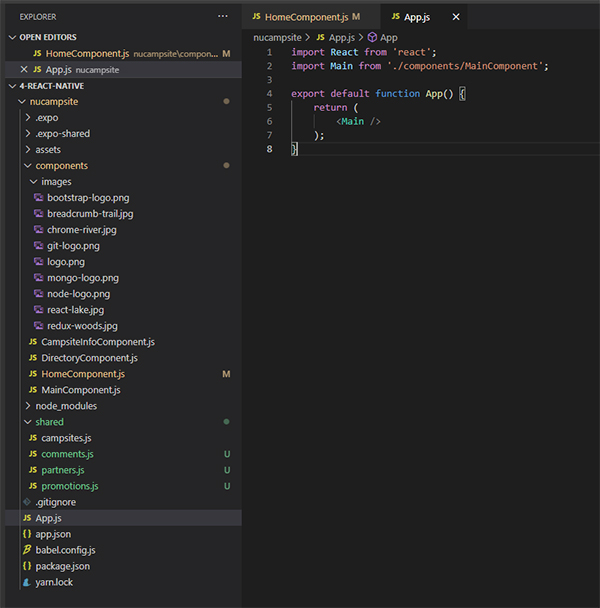
What your file and folder structure should look like now:
Additional Resources:
- React Navigation
- React Native – Navigation
- React Native – Navigation
- React Native – Platform Specific Code
- React Navigation
- React Navigation – createStackNavigator
- React Navigation – createStackNavigator navigationOptions / defaultNavigationOptions
- React Navigation – Navigation prop (this.props.navigation)
- React Navigation – navigate() (this.props.navigation.navigate)
- React Navigation – getParam() (this.props.navigation.getParam)
- MDN – Static
- React Navigation – createDrawerNavigator
- React Navigation – createStackNavigator
- React Native – ScrollView
- RNE – Card


