Bootcamp Notes – Day 6 (Wed) – NodeJS: Week 2: Node and MongoDB

Node and MongoDB
In the previous lesson you learned about how to interact with MongoDB server using Mongo REPL to manually access and update databases, and can be helpful for debugging. However in back-end development we need to access and manipulate the database from within the Node Express application. To do this we need to install a node-based driver that the Mongo developers have made available.
The MongoDB Node.js Driver provides a high-level APi that enables us to interact with MongoDB server from a Node app. We can install it with NPM like any other node module: npm install mongodb, then require it within our app to get access to database operations, the usual CRUD (creating, reading, updating, deleting) documents, collections, and more.
MongoDB Node.js Driver supports both callback-based and promise-based interactions with MongoDB server.
Node and MongoDB Part 1
- Install and use the Node MongoDB driver from NPM.
- Learn to use the driver to interact with the MongoDB database from a Node application.
Instructions
Start the MongoDB server if it is not already running
- You started the MongoDB server in the Introduction to MongoDB exercise. If it is still running, skip to the next section.
- If you have closed it since then, you will need to start it again: Open a bash terminal to the 5-NodeJS-Express-MongoDB/mongodb folder and run this command: mongod –dbpath=data
- Make sure that you are in the mongodb folder when you run this command. Leave the server running in this bash terminal.
Install the Node MongoDB driver module
- From inside the course folder (5-NodeJS-Express-MongoDB), create a new subfolder named node-mongo and open this folder in VS Code.
- Create a package.json file in the node-mongo folder and add the below content into it.
{
  "name": "node-mongo",
  "version": "1.0.0",
  "description": "Node MongoDB Example",
  "main": "index.js",
  "scripts": {
    "test": "echo \"Error: no test specified\" && exit 1",
    "start": "node index"
  }
}
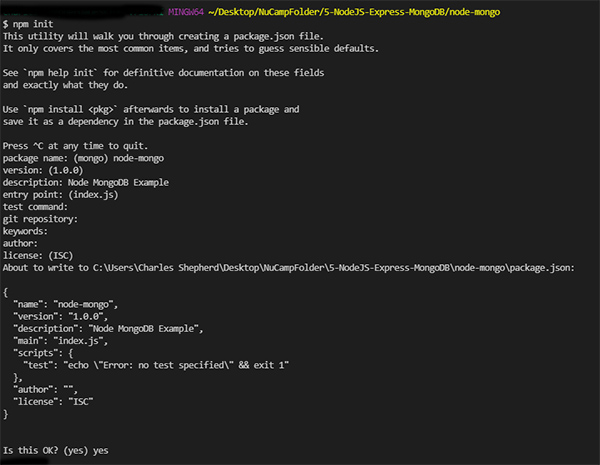
- Optional: If you wish to use nodemon with this project, update the start script above to use nodemon instead of node. Don’t forget to turn off AutoSave in VS Code and save manually if you use nodemon.
- From a bash terminal open to the node-mongo folder, install the Node MongoDB driver: npm install mongodb@3.6.2
A simple Node-MongoDB application
- Create a new file named index.js inside the node-mongo folder and add the following code to it:
const MongoClient = require('mongodb').MongoClient;
const assert = require('assert').strict;

const url = 'mongodb://localhost:27017/';
const dbname = 'nucampsite';

MongoClient.connect(url, { useUnifiedTopology: true }, (err, client) => {

    assert.strictEqual(err, null);

    console.log('Connected correctly to server');

    const db = client.db(dbname);

    db.dropCollection('campsites', (err, result) => {
        assert.strictEqual(err, null);
        console.log('Dropped Collection', result);

        const collection = db.collection('campsites');

        collection.insertOne({name: "Breadcrumb Trail Campground", description: "Test"},
        (err, result) => {
            assert.strictEqual(err, null);
            console.log('Insert Document:', result.ops);

            collection.find().toArray((err, docs) => {
                assert.strictEqual(err, null);
                console.log('Found Documents:', docs);

                client.close();
            });
        });
    });
});
- Make sure your MongoDB server is up and running.
- Then, in a separate bash terminal that is open to the 5-NodeJS-Express-MongoDB/node-mongo directory, use npm start to run the Node-MongoDB application you created in this exercise, and observe the results.
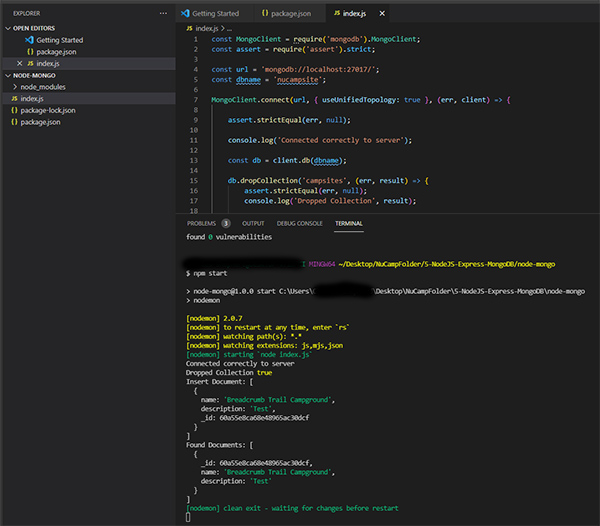
- Optional: Add a .gitignore file that excludes the node_modules folder from Git in the project folder. Initialize the Git repository, and add and commit the project files with the message “Node MongoDB Example 1”.
Node and MongoDB Part 2
- Develop a Node module containing some common MongoDB operations.
- Use the Node module in your application to communicate with the MongoDB server.
Implement a Node module of database operations
- We will once again be working in the node-mongo folder. Open this folder in VS Code.
- Create a new file named operations.js and add the following MongoDB operations to it:
const assert = require('assert').strict;

exports.insertDocument = (db, document, collection, callback) => {
    const coll = db.collection(collection);
    coll.insertOne(document, (err, result) => {
        assert.strictEqual(err, null);
        callback(result);
    });
};

exports.findDocuments = (db, collection, callback) => {
    const coll = db.collection(collection);
    coll.find().toArray((err, docs) => {
        assert.strictEqual(err, null);
        callback(docs);
    });
};

exports.removeDocument = (db, document, collection, callback) => {
    const coll = db.collection(collection);
    coll.deleteOne(document, (err, result) => {
        assert.strictEqual(err, null);
        callback(result);
    });
};

exports.updateDocument = (db, document, update, collection, callback) => {
    const coll = db.collection(collection);
    coll.updateOne(document, { $set: update }, null, (err, result) => {
        assert.strictEqual(err, null);
        callback(result);
    });
};
Use the Node module for database operations
- Update the file named index.js as follows:
const MongoClient = require('mongodb').MongoClient;
const assert = require('assert').strict;
const dboper = require('./operations');

const url = 'mongodb://localhost:27017/';
const dbname = 'nucampsite';

MongoClient.connect(url, { useUnifiedTopology: true }, (err, client) => {

    assert.strictEqual(err, null);

    console.log('Connected correctly to server');

    const db = client.db(dbname);

    db.dropCollection('campsites', (err, result) => {
        assert.strictEqual(err, null);
        console.log('Dropped Collection:', result);

        dboper.insertDocument(db, { name: "Breadcrumb Trail Campground", description: "Test"},
            'campsites', result => {
            console.log('Insert Document:', result.ops);

            dboper.findDocuments(db, 'campsites', docs => {
                console.log('Found Documents:', docs);

                dboper.updateDocument(db, { name: "Breadcrumb Trail Campground" },
                    { description: "Updated Test Description" }, 'campsites',
                    result => {
                        console.log('Updated Document Count:', result.result.nModified);

                        dboper.findDocuments(db, 'campsites', docs => {
                            console.log('Found Documents:', docs);

                            dboper.removeDocument(db, { name: "Breadcrumb Trail Campground" },
                                'campsites', result => {
                                    console.log('Deleted Document Count:', result.deletedCount);

                                    client.close();
                                }
                            );
                        });
                    }
                );
            });
        });
    });
});
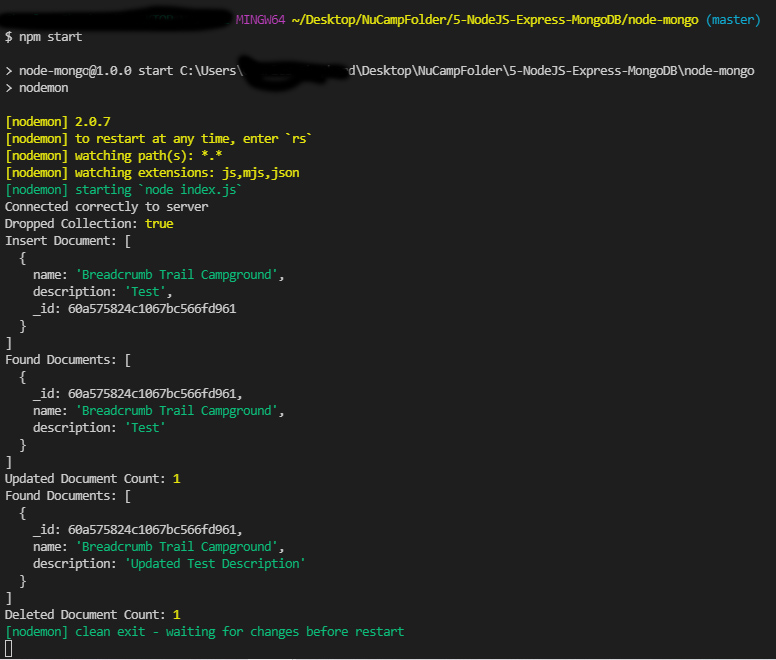
- Run the server by typing the following at the prompt, and observe the results: npm start
- Optional: Commit your updated files to Git with the message “Node MongoDB Example 2”.
Overview: Callback Hell and Promises
We will now cover a concept called Callback Hell, which is the commonly used term for the problem that arises with nested callbacks in node. We will also look at ES6 promises as one approach to addressing the callback hell problem. During the previous two exercises, you were asked to take note of the way that when we have multiple asynchronous operations using callbacks chained together so that each operation starts only when the previous one has finished, then we quickly start to see a nested structure where a callback has callback inside it, that has a callback inside it and so on forming a pyramid-like structure that is often called the pyramid of doom! Then your code will soon become very complex and not easy to decipher. This is the situation that in Node.js is called CALLBACK HELL!
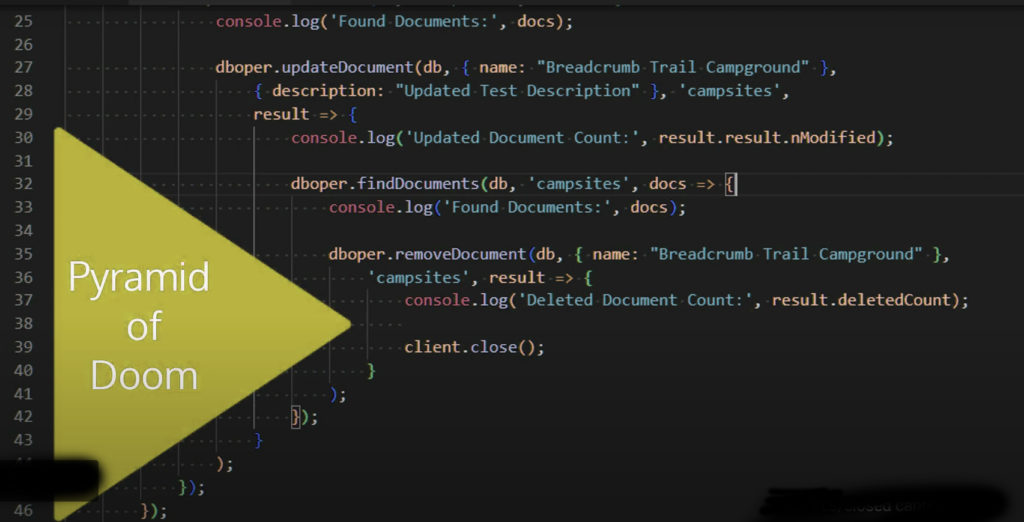
There have been several approaches toward mitigating this problem. We can’t completely avoid it because we have certain operations that need to complete before the next operation can be initiated, but we can refactor the code in ways that can help. One reason callback hell occurs is our tendency to write code with a top-down approach. It is east to get hung up with a sequential way of writing code from top to bottom and look at it as if it’s executing in that order.
One way to avoid callback hell is don’t use anonymous functions for callback, but instead declaring those functions with specific names. That is one of the approaches that people take to deal with the callback hell problem,

There are several other approaches that have been suggested and links to a couple of articles in this regard are provided in the additional resources. But in this lesson and the following exercise, we will concentrate on one particular approach. The use of promises. We can use ES6 Promises to tame Callback Hell to quite an extent. In the following exercise we will see that MongoDB Driver natively supports promises and we can rewrite our code to take advantage of that support.
What is a Promise?
A promise is a JavaScript mechanism that supports asynchronous computation. So if you have some amount of work that needs to be done, the promise acts as a proxy for a value, which is not known at the moment, but because the promise acts as a placeholder for that value, your code can continue on. Then later, if there was an error in obtaining that value then the promise will be rejected with an error. If the value was able to be obtained correctly then the promise will be resolved and the value will become available.
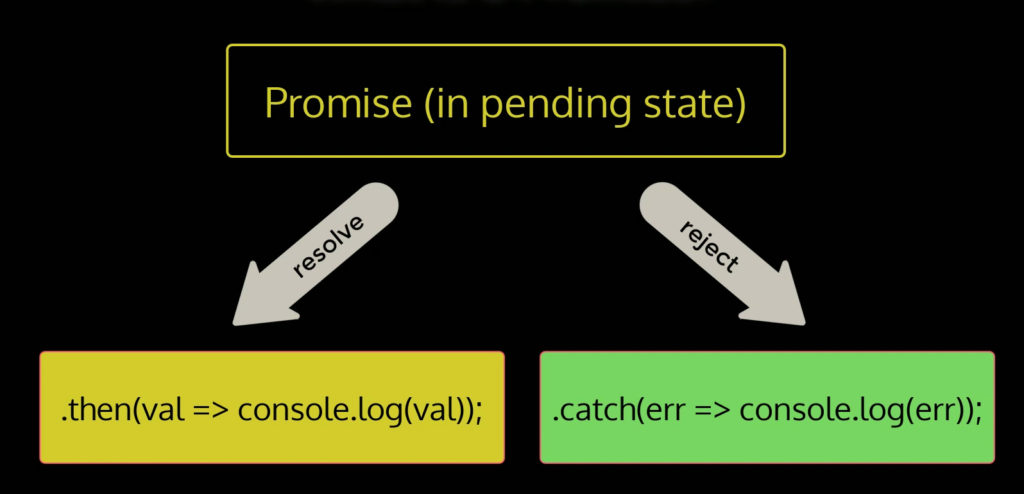
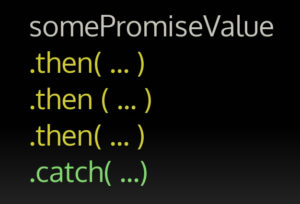
So when a promise is first made, it’s in what is called a pending state, then it will either reject or resolve and if it’s rejected the promise will give an error and if it’s resolved, the promise will the value that it originally promised. We access the result value of a promise by using the then method and there are also the newer async await keywords that were introduced in ES8, that we learned a bit about in React Native. In this course, we will use the then method. We can also catch errors using catch method on a promise. Normally, you would handle a promise by chaining the then and the catch method to the promise value.
Promise Chaining
As you saw in the last exercise we entered CALLBACK HELL, because we were trying to perform multiple asynchronous operations in sequence with each subsequent operation depending on the completion of the one before it.
With promises and the then method, it is easy to set up this kind of series of asynchronous operations using what’s called a promised chain. We will discuss this more later with an example.
Callback Hell and Promises
The MongoDB Node.js Driver natively supports promises. Whenever you use a method in its APi without providing a callback, it will automatically return value as a promise.
- Learn to use JavaScript ES6 promises to refactor a Node application to avoid callback hell.
- We will once again be working in the node-mongo folder. Open this folder in VS Code, then update operations.js as follows:
exports.insertDocument = (db, document, collection) => {
    const coll = db.collection(collection);
    return coll.insertOne(document);
};

exports.findDocuments = (db, collection) => {
    const coll = db.collection(collection);
    return coll.find({}).toArray();
};

exports.removeDocument = (db, document, collection) => {
    const coll = db.collection(collection);
    return coll.deleteOne(document);
};

exports.updateDocument = (db, document, update, collection) => {
    const coll = db.collection(collection);
    return coll.updateOne(document, { $set: update }, null);
};
- Next open index.js and update it as follows:
...MongoClient.connect(url, { useUnifiedTopology: true }).then(client => {

    console.log('Connected correctly to server');

    const db = client.db(dbname);

    db.dropCollection('campsites')
    .then(result => {
        console.log('Dropped Collection:', result);
    })
    .catch(err => console.log('No collection to drop.'));

    dboper.insertDocument(db, {name: "Breadcrumb Trail Campground", description: "Test"}, 'campsites')
    .then(result => {
        console.log('Insert Document:', result.ops);

        return dboper.findDocuments(db, 'campsites');
    })
    .then(docs => {
        console.log('Found Documents:', docs);

        return dboper.updateDocument(db, { name: "Breadcrumb Trail Campground" },
            { description: "Updated Test Description" }, 'campsites');
    })
    .then(result => {
        console.log('Updated Document Count:', result.result.nModified);

        return dboper.findDocuments(db, 'campsites');
    })
    .then(docs => {
        console.log('Found Documents:', docs);

        return dboper.removeDocument(db, { name: "Breadcrumb Trail Campground" },
            'campsites');
    })
    .then(result => {
        console.log('Deleted Document Count:', result.deletedCount);

        return client.close();
    })
    .catch(err => {
        console.log(err);
        client.close();
    });
})
.catch(err => console.log(err));
- Run the Node application and observe the results.
- Optional: Commit your changed files with the message “Node Callback Hell and Promises”.
Additional Resources:
- MongoDB Node.js Driver Documentation
- MongoDB Node.js Driver API – client.connect(), collection.insertOne(), collection.find(), db.dropCollection()
- Node.js – assert.strictEqual()
- MongoDB – Node.js Native Driver
- FlavioCopes – How to Use MongoDB with NodeJS
- W3Schools – Node.js MongoDB
- Notes on useUnifiedTopology
- MongoDB Node.js Driver – collection.deleteOne()
- MongoDB Node.js Driver – collection.updateOne()
- MongoDB – Update Operators: $set
- Callbackhell.com (older but still informative article)
- ColinToh – Staying Sane With Asynchronous Programming: Promises and Generators
- JavaScript Teacher – The Great Escape from Callback Hell
- Nucamp – React Week 5: Promises
- Callback Hell
- Medium.com article – The Great Escape from Callback Hell


